Getting started
This tutorial explains how to create a new Angular application using the startup template, configure and run it.
Setup your development environment
First things first! Let's setup your development environment before creating the first project.
Pre-requirements
The following tools should be installed on your development machine:
Visual Studio 2019 (v16.4+) for Windows / Visual Studio for Mac.
Redis: The applications use Redis as as distributed cache. So, you need to have Redis installed & running.
You can use another editor instead of Visual Studio as long as it supports .NET Core and ASP.NET Core.
Install the ABP CLI
ABP CLI is a command line interface that is used to authenticate and automate some tasks for ABP based applications.
ABP CLI is a free & open source tool for the ABP framework.
First, you need to install the ABP CLI using the following command:
dotnet tool install -g Volo.Abp.Cli
If you've already installed, you can update it using the following command:
dotnet tool update -g Volo.Abp.Cli
Create a new project
This document assumes that you prefer to use Angular as the UI framework and MongoDB as the database provider. For other options, please change the preference on top of this document.
Using the ABP CLI to create a new project
Use the new command of the ABP CLI to create a new project:
abp new Acme.BookStore -t app -u angular -d mongodb--separate-identity-server
-targument specifies the startup template name.appis the startup template that contains the essential ABP Modules pre-installed and configured for you.-uargument specifies the UI framework,angularin this case.--separate-identity-serverargument is used to separate the identity server application from the API host application. If not specified, you will have a single endpoint.-dargument specifies the database provider,mongodbin this case.
You can use different level of namespaces; e.g. BookStore, Acme.BookStore or Acme.Retail.BookStore.
ABP CLI commands & options
ABP CLI document covers all of the available commands and options for the ABP CLI. See the ABP Startup Templates document for other templates.
The solution structure
There are three folders in the created solution:
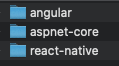
angularfolder contains the Angular UI application.aspnet-corefolder contains the backend solution.react-nativefolder contains the React Native UI application.
Open the .sln (Visual Studio solution) file under the aspnet-core folder:
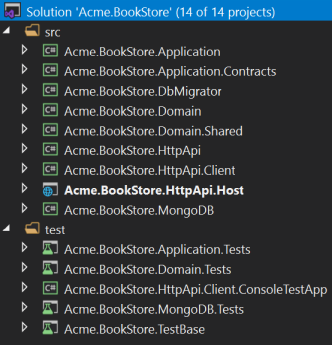
About the projects in your solution
Your solution may have slightly different structure based on your UI, database and other preferences.
The solution has a layered structure (based on Domain Driven Design) and also contains unit & integration test projects.
Integration tests projects are properly configured to work with in-memory MongoDB database created per test (used Mongo2Go library).
See the application template document to understand the solution structure in details.
Create the database
Database connection string
Check the connection string in the appsettings.json file under the .HttpApi.Host project:
"ConnectionStrings": {
  "Default": "mongodb://localhost:27017/BookStore"
}
The solution is configured to use MongoDB in your local computer, so you need to have a MongoDB server instance up and running or change the connection string to another MongoDB server.
Seed initial data
The solution comes with a .DbMigrator console application which seeds the initial data. It is useful on development as well as on production environment.
.DbMigratorproject has its ownappsettings.json. So, if you have changed the connection string above, you should also change this one.
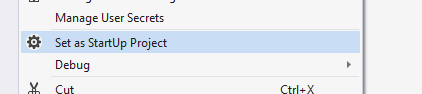
Right click to the .DbMigrator project and select Set as StartUp Project
Hit F5 (or Ctrl+F5) to run the application. It will have an output like shown below:
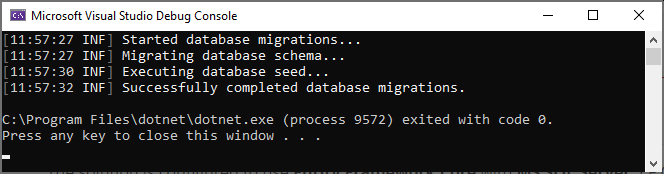
Initial seed data creates the
adminuser in the database which is then used to login to the application. So, you need to use.DbMigratorat least once for a new database.
Run the application
Running the HTTP API Host (server-side)
Ensure that the .IdentityServer project is the startup project. Run the application which will open a login page in your browser.
Use Ctrl+F5 in Visual Studio (instead of F5) to run the application without debugging. If you don't have a debug purpose, this will be faster.
You can login, but you cannot enter to the main application here. This is just the authentication server.
Ensure that the .HttpApi.Host project is the startup project and run the application which will open a Swagger UI:
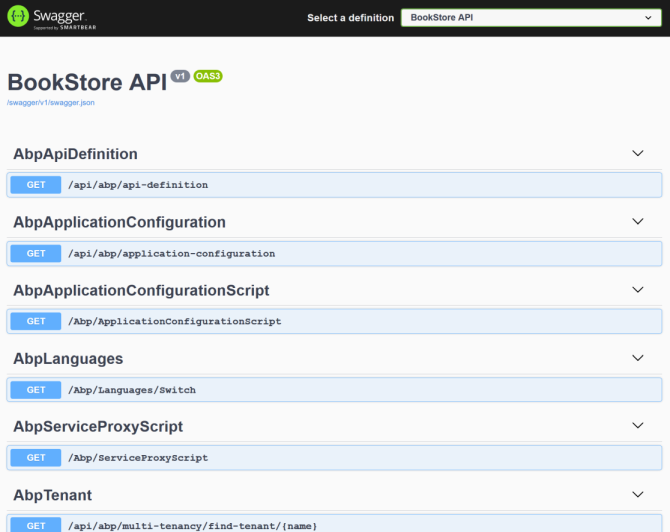
You can see the application APIs and test them here. Get more info about the Swagger UI.
Authorization for the Swagger UI
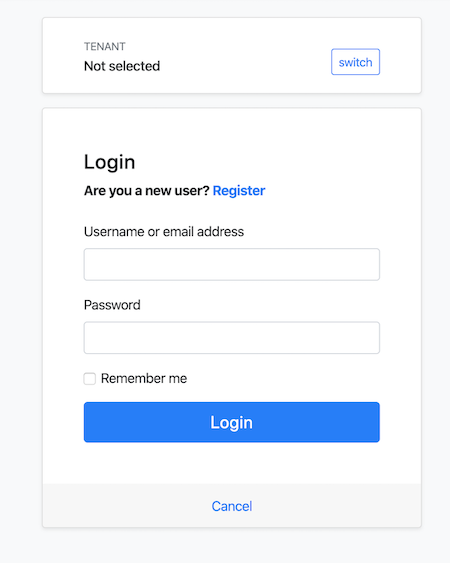
Most of the HTTP APIs require authentication & authorization. If you want to test authorized APIs, manually go to the
/Account/Loginpage, enteradminas the username and1q2w3E*as the password to login to the application. Then you will be able to execute authorized APIs too.
Running the Angular application (client-side)
Go to the angular folder, open a command line terminal, type the yarn command (we suggest to the yarn package manager while npm install will also work in most cases)
yarn
Once all node modules are loaded, execute yarn start (or npm start) command:
yarn start
Wait Angular CLI to launch Webpack dev-server with BrowserSync.
This will take care of compiling your TypeScript code, and automatically reloading your browser.
After it finishes, Angular Live Development Server will be listening on localhost:4200,
open your web browser and navigate to localhost:4200
Enter admin as the username and 1q2w3E* as the password to login to the application:
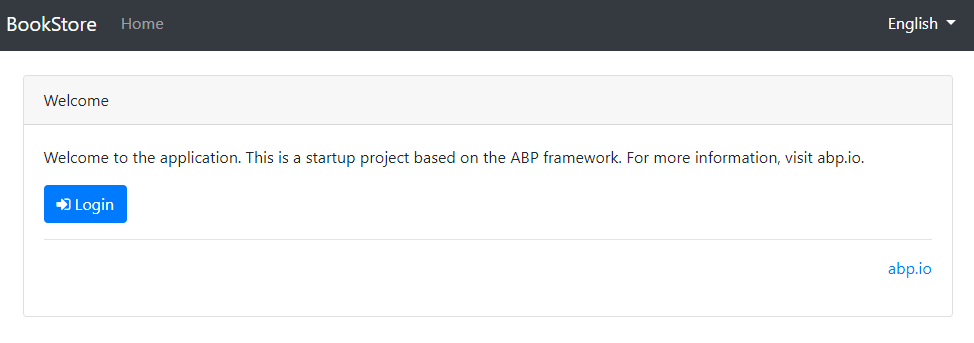
The application is up and running. You can start developing your application based on this startup template.
Mobile Development
ABP platform provide React Native template to develop mobile applications.
The solution includes the React Native application in the
react-nativefolder as default. If you don't plan to develop a mobile application with React Native, you can ignore this step and delete thereact-nativefolder.
The React Native application running on an Android emulator or a physical phone cannot connect to the backend on localhost. To fix this problem, it is necessary to run backend on the local IP.
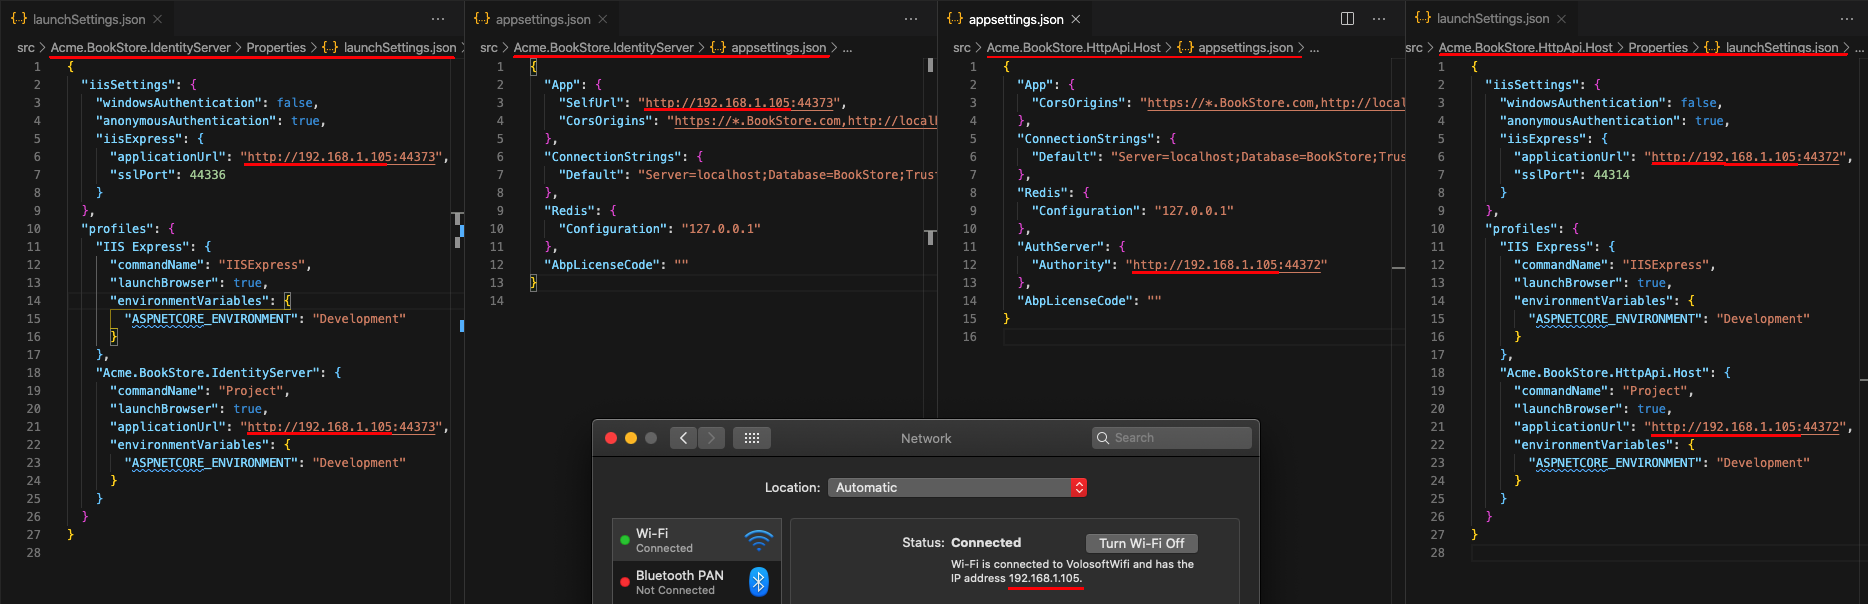
- Open the
appsettings.jsonin the.IdentityServerfolder. Replace thelocalhostaddress on theSelfUrlproperty with your local IP address. - Open the
launchSettings.jsonin the.IdentityServer/Propertiesfolder. Replace thelocalhostaddress on theapplicationUrlproperties with your local IP address. - Open the
appsettings.jsonin the.HttpApi.Hostfolder. Replace thelocalhostaddress on theAuthorityproperty with your local IP address. - Open the
launchSettings.jsonin the.HttpApi.Host/Propertiesfolder. Replace thelocalhostaddress on theapplicationUrlproperties with your local IP address.
Run the backend as described in the Running the HTTP API Host (server-side) section.
React Native application does not trust the auto-generated .NET HTTPS certificate, you should use the HTTP during development.
Go to the react-native folder, open a command line terminal, type the yarn command (we suggest to the yarn package manager while npm install will also work in most cases):
yarn
- Open the
Environment.jsin thereact-nativefolder and replace thelocalhostaddress on theapiUrlandissuerproperties with your local IP address as shown below:
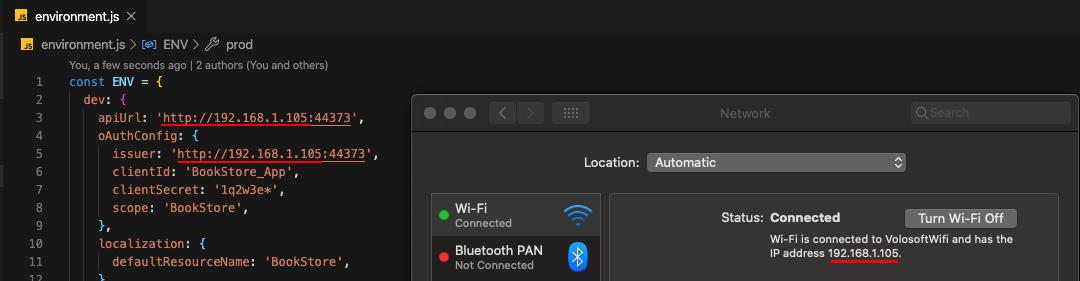
Make sure that
issuermatches the running address of the.IdentityServerproject,apiUrlmatches the running address of the.HttpApi.Hostproject.
Once all node modules are loaded, execute yarn start (or npm start) command:
yarn start
Wait Expo CLI to start. Expo CLI opens the management interface on the http://localhost:19002/ address.
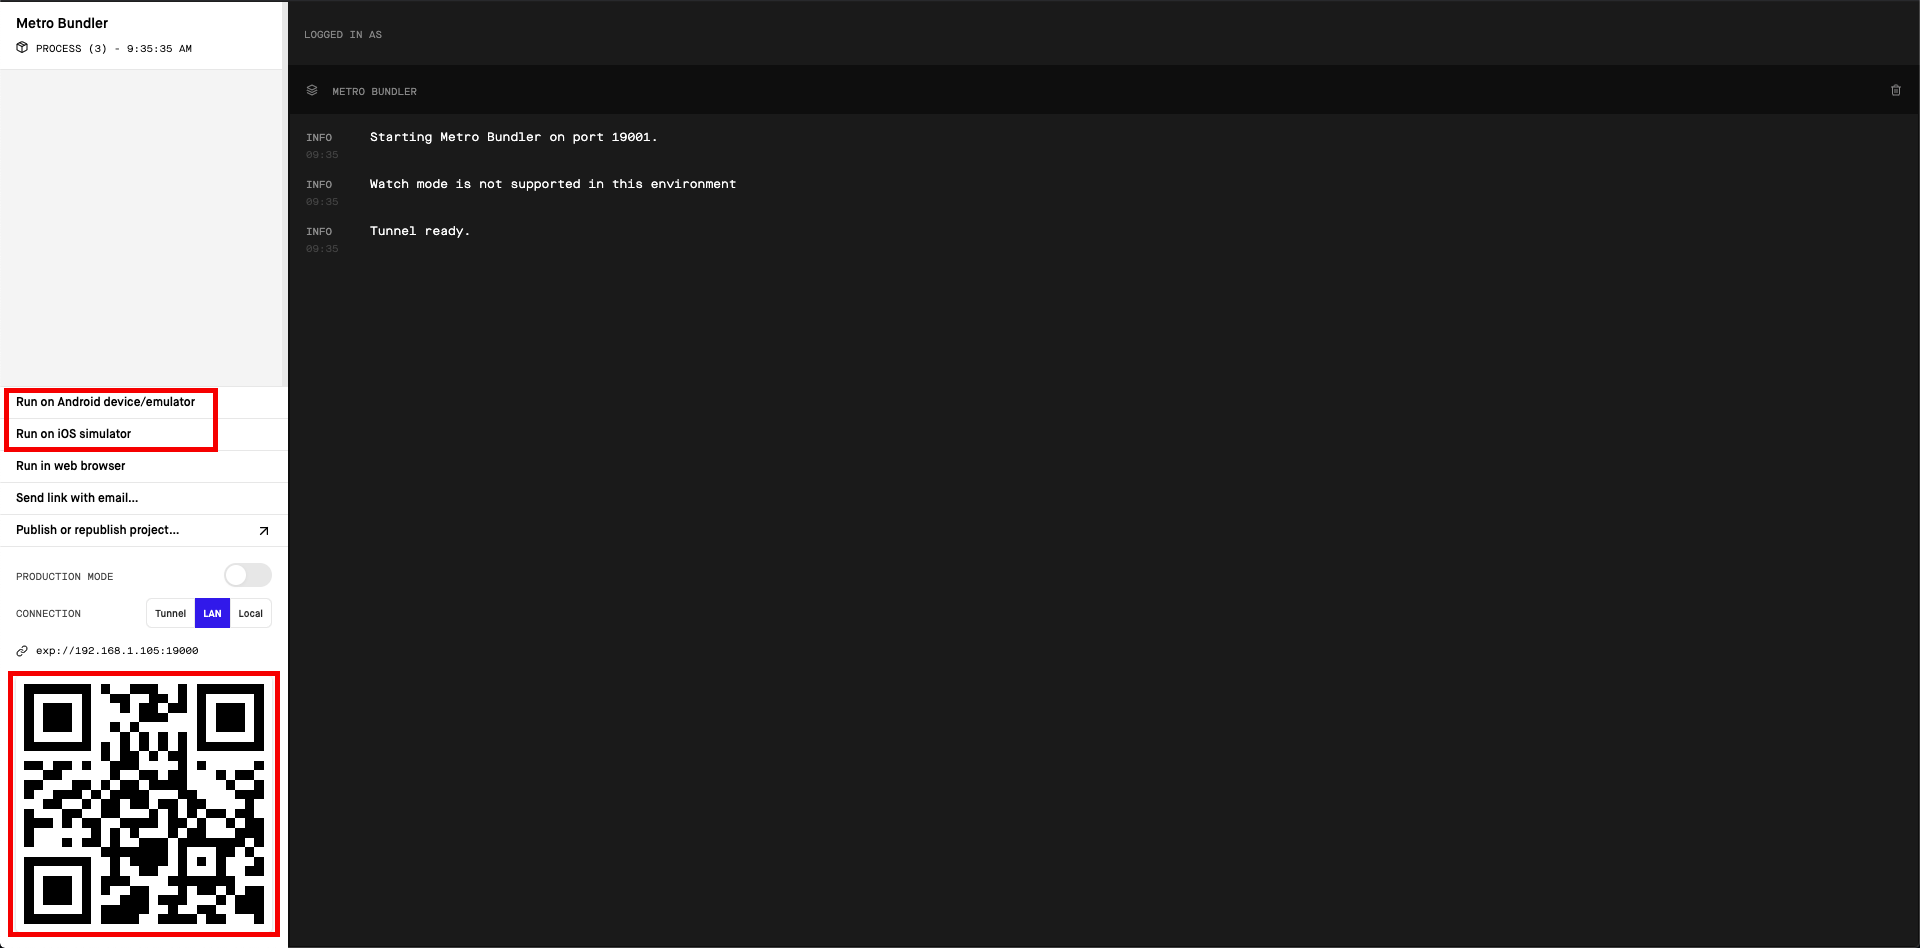
In the above management interface, you can start the application with an Android emulator, an iOS simulator or a physical phone by the scan the QR code with the Expo Client.
See the Android Studio Emulator, iOS Simulator documents on expo.io.
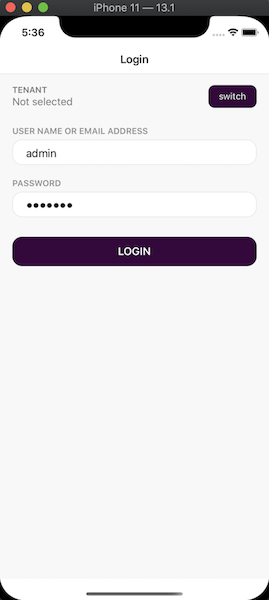
Enter admin as the username and 1q2w3E* as the password to login to the application.
The application is up and running. You can continue to develop your application based on this startup template.
The application startup template includes the TenantManagement and Identity modules.
What's next?
Application development tutorial
 08-09 May


