Getting Started
This tutorial explains how to create a new web application using the application startup template.
This document assumes that you prefer to use MVC / Razor Pages as the UI framework and MongoDB as the database provider. For other options, please change the preference on top of this document.
Setup Your Development Environment
First things first! Let's setup your development environment before creating the first project.
Pre-Requirements
The following tools should be installed on your development machine:
Visual Studio 2019 for Windows / Visual Studio for Mac. 1
Yarn v1.20+ (not v2) 2 or npm v6+ (already installed with Node)
Redis (the startup solution uses the Redis as the distributed cache).
1 You can use another editor instead of Visual Studio as long as it supports .NET Core and ASP.NET Core. ↩
2 Yarn v2 works differently and is not supported. ↩
Install the ABP CLI
ABP CLI is a command line interface that is used to automate some common tasks for ABP based solutions.
ABP CLI is a free & open source tool for the ABP framework.
First, you need to install the ABP CLI using the following command:
dotnet tool install -g Volo.Abp.Cli
If you've already installed, you can update it using the following command:
dotnet tool update -g Volo.Abp.Cli
Create a New Project
Use the new command of the ABP CLI to create a new project:
abp new Acme.BookStore -d mongodb --tiered
You can use different level of namespaces; e.g. BookStore, Acme.BookStore or Acme.Retail.BookStore.
Alternatively, you can select the "Direct Download" tab from the ABP Framework web site to create a new solution.
--tieredargument is used to create N-tiered solution where authentication server, UI and API layers are physically separated.
ABP CLI Commands & Options
ABP CLI document covers all of the available commands and options for the ABP CLI. This document uses the application startup template to create a new web application. See the ABP Startup Templates document for other templates.
The Solution Structure
The solution has a layered structure (based on the Domain Driven Design) and contains unit & integration test projects. See the application template document to understand the solution structure in details.
MongoDB Transactions
The startup template disables transactions in the .MongoDB project by default. If your MongoDB server supports transactions, you can enable the it in the YourProjectMongoDbModule class:
Configure<AbpUnitOfWorkDefaultOptions>(options =>
{
    options.TransactionBehavior = UnitOfWorkTransactionBehavior.Auto;
});
Or you can delete this code since this is already the default behavior.
Create the Database
Connection String
Check the connection string in the appsettings.json file under the .IdentityServer and .HttpApi.Host projects
"ConnectionStrings": {
  "Default": "mongodb://localhost:27017/BookStore"
}
The solution is configured to use MongoDB in your local computer, so you need to have a MongoDB server instance up and running or change the connection string to another MongoDB server.
Seed Initial Data
The solution comes with a .DbMigrator console application which seeds the initial data. It is useful on development as well as on production environment.
.DbMigratorproject has its ownappsettings.json. So, if you have changed the connection string above, you should also change this one.
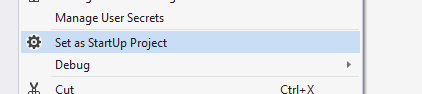
Right click to the .DbMigrator project and select Set as StartUp Project
Hit F5 (or Ctrl+F5) to run the application. It will have an output like shown below:

Initial seed data creates the
adminuser in the database (with the password is1q2w3E*) which is then used to login to the application. So, you need to use.DbMigratorat least once for a new database.
Run the Application
- Ensure that the
.IdentityServerproject is the startup project. Run this application that will open a login page in your browser.
Use Ctrl+F5 in Visual Studio (instead of F5) to run the application without debugging. If you don't have a debug purpose, this will be faster.
You can login, but you cannot enter to the main application here. This is just the authentication server.
- Ensure that the
.HttpApi.Hostproject is the startup project and run the application which will open a Swagger UI in your browser.
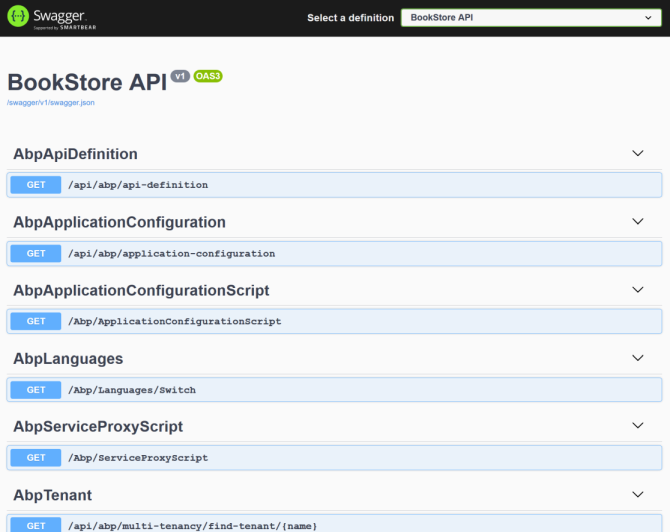
This is the HTTP API that is used by the web application.
- Lastly, ensure that the
.Webproject is the startup project and run the application which will open a welcome page in your browser
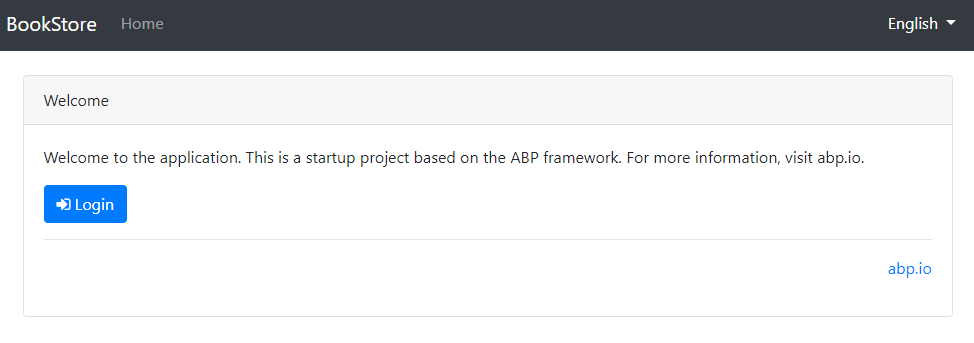
Click to the login button which will redirect you to the authentication server to login to the application:
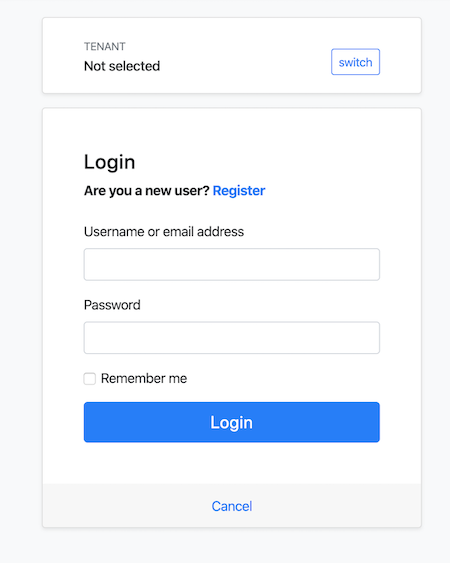
Enter admin as the username and 1q2w3E* as the password to login to the application. The application is up and running. You can start developing your application based on this startup template.
Mobile Development
If you want to include a React Native project in your solution, add -m react-native (or --mobile react-native) argument to project creation command. This is a basic React Native startup template to develop mobile applications integrated to your ABP based backends.
See the Getting Started with the React Native document to learn how to configure and run the React Native application.
 08-09 May


