Quick Start
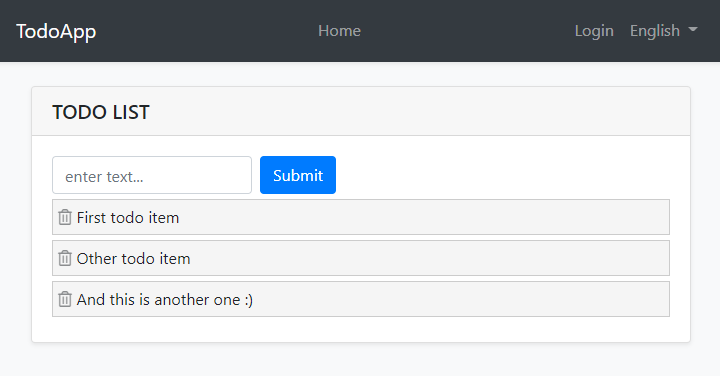
This is a single-part, quick-start tutorial to build a simple todo application with the ABP Framework. Here, a screenshot from the final application:
You can find source code of the completed application here.
Pre-Requirements
- An IDE (e.g. Visual Studio) that supports .NET 5.0+ development.
Creating a New Solution
We will use the ABP CLI to create new solutions with the ABP Framework. You can run the following command in a command-line terminal to install it:
dotnet tool install -g Volo.Abp.Cli
Then create an empty folder, open a command-line terminal and execute the following command in the terminal:
abp new TodoApp
This will create a new solution, named TodoApp. Once the solution is ready, open it in your favorite IDE.
Create the Database
If you are using Visual Studio, right click to the TodoApp.DbMigrator project, select Set as StartUp Project, then hit Ctrl+F5 to run it without debugging. It will create the initial database and seed the initial data.
Some IDEs (e.g. Rider) may have problems for the first run since DbMigrator adds the initial migration and re-compiles the project. In this case, open a command-line terminal in the folder of the
.DbMigratorproject and execute thedotnet runcommand.
Run the Application
It is good to run the application before starting the development. Ensure the TodoApp.Web project is the startup project, then run the application (Ctrl+F5 in Visual Studio) to see the initial UI:
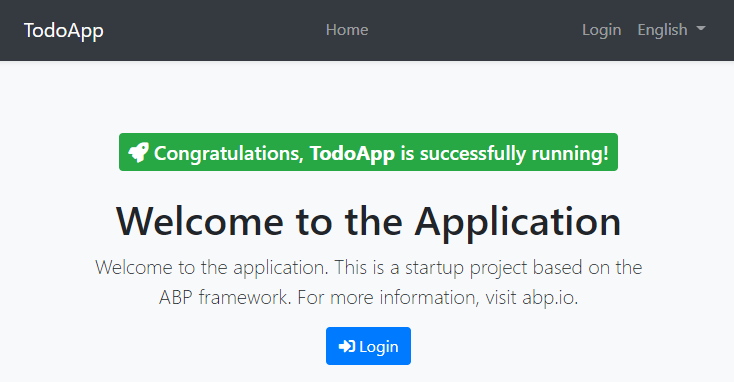
You can click to the Login button, use admin as the username and 1q2w3E* as the password to login to the application.
All ready. We can start the coding!
Domain Layer
This application has a single entity and we are starting by creating it. Create a new TodoItem class inside the TodoApp.Domain project:
using System;
using Volo.Abp.Domain.Entities;

namespace TodoApp
{
    public class TodoItem : BasicAggregateRoot<Guid>
    {
        public string Text { get; set; }
    }
}
BasicAggregateRoot is one the simplest base class to create root entities, and Guid is the primary key (Id) of the entity here.
Database Integration
Next step is to setup the Entity Framework Core configuration.
Mapping Configuration
Open the TodoAppDbContext class in the EntityFrameworkCore folder of the TodoApp.EntityFrameworkCore project and add a new DbSet property to this class:
public DbSet<TodoItem> TodoItems { get; set; }
Then open the TodoAppDbContextModelCreatingExtensions class in the same folder and add a mapping configuration for the TodoItem class as shown below:
public static void ConfigureTodoApp(this ModelBuilder builder)
{
    Check.NotNull(builder, nameof(builder));

    builder.Entity<TodoItem>(b =>
    {
        b.ToTable("TodoItems");
    });
}
We've mapped TodoItem entity to a TodoItems table in the database.
Code First Migrations
The startup solution is configured to use Entity Framework Core Code First Migrations. Since we've changed the database mapping configuration, we should create a new migration and apply changes to the database.
Open a command-line terminal in the directory of the TodoApp.EntityFrameworkCore.DbMigrations project and type the following command:
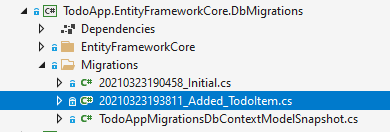
dotnet ef migrations add Added_TodoItem
This will add a new migration class to the project:
You can apply changes to the database using the following command, in the same command-line terminal:
dotnet ef database update
If you are using Visual Studio, you may want to use
Add-Migration Added_TodoItemandUpdate-Databasecommands in the Package Manager Console (PMC). In this case, ensure thatTodoApp.Webis the startup project andTodoApp.EntityFrameworkCore.DbMigrationsis the Default Project in PMC.
Now, we can use ABP repositories to save and retrieve todo items, as we'll do in the next section.
Application Layer
An Application Service is used to perform use cases of the application. We need to perform the following use cases;
- Get the list of todo items
- Create a new todo item
- Delete an existing todo item
Application Service Interface
We can start by defining an interface for the application service. Create a new ITodoAppService interface in the TodoApp.Application.Contracts project, as shown below:
using System;
using System.Collections.Generic;
using System.Threading.Tasks;
using Volo.Abp.Application.Services;

namespace TodoApp
{
    public interface ITodoAppService : IApplicationService
    {
        Task<List<TodoItemDto>> GetListAsync();
        Task<TodoItemDto> CreateAsync(string text);
        Task DeleteAsync(Guid id);
    }
}
Data Transfer Object
GetListAsync and CreateAsync methods return TodoItemDto. Applications Services typically gets and returns DTOs (Data Transfer Objects) instead of entities. So, we should define the DTO class here. Create a new TodoItemDto class inside the TodoApp.Application.Contracts project:
using System;

namespace TodoApp
{
    public class TodoItemDto
    {
        public Guid Id { get; set; }
        public string Text { get; set; }
    }
}
This is a very simple DTO class that matches to our TodoItem entity. We are ready to implement the ITodoAppService.
Application Service Implementation
Create a TodoAppService class inside the TodoApp.Application project, as shown below:
using System;
using System.Collections.Generic;
using System.Linq;
using System.Threading.Tasks;
using Volo.Abp.Application.Services;
using Volo.Abp.Domain.Repositories;

namespace TodoApp
{
    public class TodoAppService : ApplicationService, ITodoAppService
    {
        private readonly IRepository<TodoItem, Guid> _todoItemRepository;

        public TodoAppService(IRepository<TodoItem, Guid> todoItemRepository)
        {
            _todoItemRepository = todoItemRepository;
        }

        // TODO: Implement the methods here...
    }
}
This class inherits from the ApplicationService class of the ABP Framework and implements the ITodoAppService that was defined before. ABP provides default generic repositories for the entities. We can use them to perform the fundamental database operations. This class injects IRepository<TodoItem, Guid>, which is the default repository for the TodoItem entity. We will use it to implement the use cases described before.
Getting Todo Items
Let's start by implementing the GetListAsync method:
public async Task<List<TodoItemDto>> GetListAsync()
{
    var items = await _todoItemRepository.GetListAsync();
    return items
        .Select(item => new TodoItemDto
        {
            Id = item.Id,
            Text = item.Text
        }).ToList();
}
We are simply getting the complete TodoItem list from database, mapping them to TodoItemDto objects and returning as the result.
Creating a New Todo Item
Next method is CreateAsync and we can implement it as shown below:
public async Task<TodoItemDto> CreateAsync(string text)
{
    var todoItem = await _todoItemRepository.InsertAsync(
        new TodoItem {Text = text}
    );

    return new TodoItemDto
    {
        Id = todoItem.Id,
        Text = todoItem.Text
    };
}
Repository's InsertAsync method inserts the given TodoItem to database and returns the same TodoItem object. It also sets the Id, so we can use it on the returning object. We are simply returning a TodoItemDto by creating from the new TodoItem entity.
Deleting a Todo Item
Finally, we can implement the DeleteAsync as the following code block:
public async Task DeleteAsync(Guid id)
{
    await _todoItemRepository.DeleteAsync(id);
}
The application service is ready to be used from the UI layer.
User Interface Layer
It is time to show the todo items on the UI! Before starting to write the code, it would be good to remember what we are trying to build. Here, a sample screenshot from the final UI:
We will keep the UI side minimal for this tutorial to make the tutorial simple and focused. See the web application development tutorial to build real-life pages with all aspects.
Index.cshtml.cs
Open the Index.cshtml.cs file in the Pages folder of the TodoApp.Web project and replace the content with the following code block:
using System.Collections.Generic;
using System.Threading.Tasks;

namespace TodoApp.Web.Pages
{
    public class IndexModel : TodoAppPageModel
    {
        public List<TodoItemDto> TodoItems { get; set; }

        private readonly ITodoAppService _todoAppService;

        public IndexModel(ITodoAppService todoAppService)
        {
            _todoAppService = todoAppService;
        }

        public async Task OnGetAsync()
        {
            TodoItems = await _todoAppService.GetListAsync();
        }
    }
}
This class uses the ITodoAppService to get the list of todo items and assign the the TodoItems property. We will use it to render the todo items on the razor page.
Index.cshtml
Open the Index.cshtml file in the Pages folder of the TodoApp.Web project and replace with the following content:
@page
@model TodoApp.Web.Pages.IndexModel
@section styles {
    <abp-style src="/Pages/Index.css" />
}
@section scripts {
    <abp-script src="/Pages/Index.js" />
}
<div class="container">
    <abp-card>
        <abp-card-header>
            <abp-card-title>
                TODO LIST
            </abp-card-title>
        </abp-card-header>
        <abp-card-body>
            <!-- FORM FOR NEW TODO ITEMS -->
            <form id="NewItemForm" class="form-inline">
                <input id="NewItemText"
                       type="text"
                       class="form-control mr-2"
                       placeholder="enter text...">
                <button type="submit" class="btn btn-primary">Submit</button>
            </form>

            <!-- TODO ITEMS LIST -->
            <ul id="TodoList">
                @foreach (var todoItem in Model.TodoItems)
                {
                    <li data-id="@todoItem.Id">
                        <i class="fa fa-trash-o"></i> @todoItem.Text
                    </li>
                }
            </ul>
        </abp-card-body>
    </abp-card>
</div>
We are using ABP's card tag helper to create a simple card view. You could directly use the standard bootstrap HTML structure, however the ABP tag helpers make it much easier and type safe.
This page imports a CSS and a JavaScript file, so we should also create them.
Index.js
Open the Index.js file in the Pages folder of the TodoApp.Web project and replace with the following content:
$(function () {

    // DELETING ITEMS /////////////////////////////////////////
    $('#TodoList').on('click', 'li i', function(){
        var $li = $(this).parent();
        var id = $li.attr('data-id');

        todoApp.todo.delete(id).then(function(){
            $li.remove();
            abp.notify.info('Deleted the todo item.');
        });
    });

    // CREATING NEW ITEMS /////////////////////////////////////
    $('#NewItemForm').submit(function(e){
        e.preventDefault();

        var todoText = $('#NewItemText').val();
        todoApp.todo.create(todoText).then(function(result){
            $('<li data-id="' + result.id + '">')
                .html('<i class="fa fa-trash-o"></i> ' + result.text)
                .appendTo($('#TodoList'));
            $('#NewItemText').val('');
        });
    });
});
In the first part, we are registering to click events of the trash icons near to the todo items, deleting the related item on the server and showing a notification on the UI. Also, we are removing the deleted item from DOM, so we don't need to refresh the page.
In the second part, we are creating a new todo item on the server. If it succeed, we are then manipulating DOM to insert a new <li> element to the todo list. In this way, no need to refresh the whole page after creating a new todo item.
The interesting part here is how we communicate with the server. See the Dynamic JavaScript Proxies & Auto API Controllers section to understand how it works. But now, let's continue and complete the application.
Index.css
As the final touch, open the Index.css file in the Pages folder of the TodoApp.Web project and replace with the following content:
#TodoList{
    list-style: none;
    margin: 0;
    padding: 0;
}

#TodoList li {
    padding: 5px;
    margin: 5px 0px;
    border: 1px solid #cccccc;
    background-color: #f5f5f5;
}

#TodoList li i
{
    opacity: 0.5;
}

#TodoList li i:hover
{
    opacity: 1;
    color: #ff0000;
    cursor: pointer;
}
This is a simple styling for the todo page. We believe that you can do much better :)
Now, you can run the application again to see the result.
Dynamic JavaScript Proxies & Auto API Controllers
In the Index.js file, we've used todoApp.todo.delete(...) and todoApp.todo.create(...) functions to communicate with the server. These functions are dynamically created by the ABP Framework, thanks to the Dynamic JavaScript Client Proxy system. They perform HTTP API calls to the server and return a promise, so you can register a callback to the then function as we've done above.
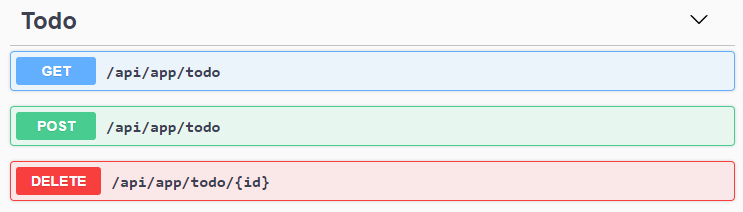
However, you may ask that we haven't created any API Controller, so how server handles these requests? This question brings us the Auto API Controller feature of the ABP Framework. It automatically converts the application services to API Controllers by conventions.
If you open the Swagger UI by entering the /swagger URL in your application, you can see the Todo API:
Conclusion
In this tutorial, we've build a very simple application to warm up to the ABP Framework. If you are looking to build a serious application, please check the web application development tutorial which covers all the aspects of a real-life web application development.
Source Code
You can find source code of the completed application here.
 08-09 May


