ABP Angular Quick Start
How to Prepare Development Environment
Please follow the steps below to prepare your development environment for Angular.
- Install Node.js: Please visit Node.js downloads page and download proper Node.js v12 or v14 installer for your OS. An alternative is to install NVM and use it to have multiple versions of Node.js in your operating system.
- [Optional] Install Yarn: You may install Yarn v1 (not v2) following the instructions on the installation page. Yarn v1 delivers an arguably better developer experience compared to npm v6 and below. You may skip this step and work with npm, which is built-in in Node.js, instead.
- [Optional] Install VS Code: VS Code is a free, open-source IDE which works seamlessly with TypeScript. Although you can use any IDE including Visual Studio or Rider, VS Code will most likely deliver the best developer experience when it comes to Angular projects. ABP project templates even contain plugin recommendations for VS Code users, which VS Code will ask you to install when you open the Angular project folder. Here is a list of recommended extensions:
How to Start a New Angular Project
You have multiple options to initiate a new Angular project that works with ABP:
1. Using ABP CLI
ABP CLI is probably the most convenient and flexible way to initiate an ABP solution with an Angular frontend. Simply install the ABP CLI and run the following command in your terminal:
abp new MyCompanyName.MyProjectName -csf -u angular
To see further options in the CLI, please visit the CLI manual.
This command will prepare a solution with an Angular and a .NET Core project in it. Please visit Getting Started section for further instructions on how to set up the backend of your solution.
To continue reading without checking other methods, visit Angular project structure section.
2. Direct Download
You may download a solution scaffold directly on ABP.io if you are more comfortable with GUI or simply want to try ABP without installing the CLI.
Please do the following:
- Click on the "DIRECT DOWNLOAD" tab.
- Fill out the short form about your project.
- Click on the "Create now" button.
...and a customized download will start in a few seconds.
To avoid IDE warnings, run yarn or npm install in the Angular root folder before you continue to the next section. It is not imperative but recommended.
Angular Project Structure
After creating a solution, open its "angular" directory in your IDE. This is how the contents of the root folder looks like:
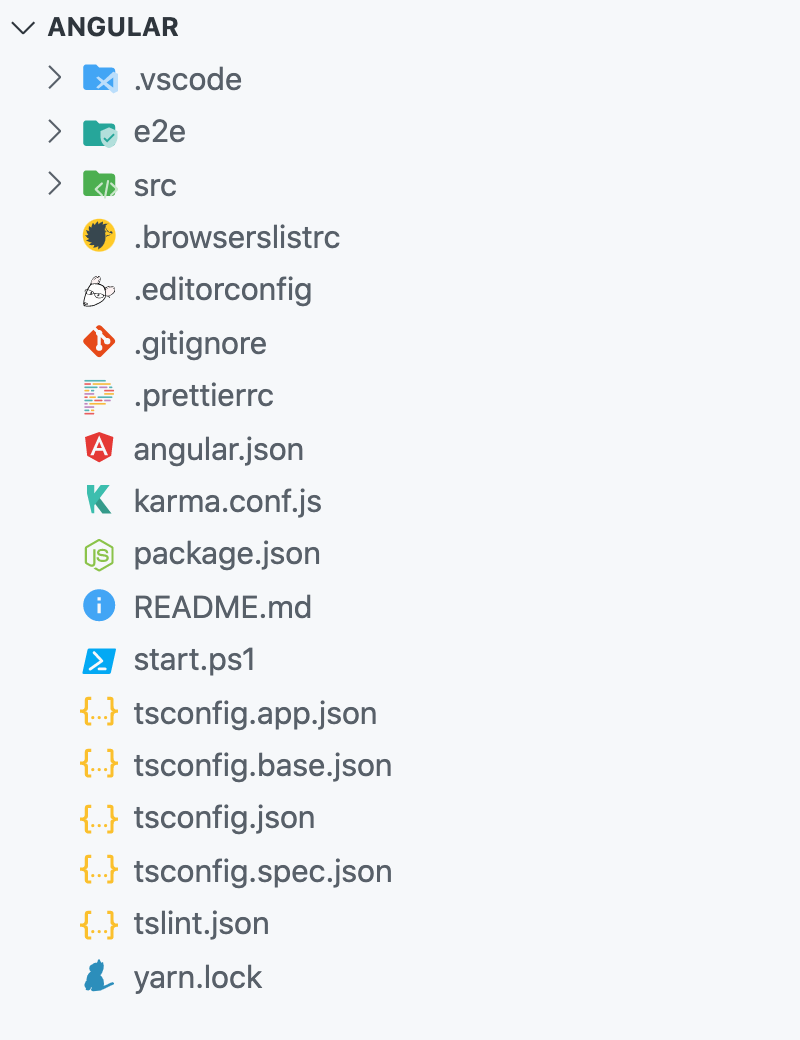
Here is what these folders and files are for:
- .vscode has extension recommendations in it.
- e2e is a separate app for possible end-to-end tests.
- src is where the source files for your application are placed. We will have a closer look in a minute.
- .browserlistrc helps configuring browser compatibility of your Angular app.
- .editorconfig helps you have a shared coding style for separate editors and IDEs. Check EditorConfig.org for details.
- .gitignore defined which files and folders should not be tracked by git. Check git documentation for details.
- .prettierrc includes simple coding style choices for Prettier, an auto-formatter for TypeScript, HTML, CSS, and more. If you install recommended extensions to VS Code, you will never have to format your code anymore.
- angular.json is where Angular workspace is defined. It holds project configurations and workspace preferences. Please refer to Angular workspace configuration for details.
- karma.conf.js holds Karma test runner configurations.
- package.json is where your package dependencies are listed. It also includes some useful scripts for developing, testing, and building your application.
- README.md includes some of Angular CLI command examples. You either have to install Angular CLI globally or run these commands starting with
yarnornpxto make them work. - start.ps1 is a simple PowerShell script to install dependencies and start a development server via Angular CLI, but you probably will not need that after reading this document.
- tsconfig.json and all other tsconfig files in general, include some TypeScript and Angular compile options.
- yarn.lock enables installing consistent package versions across different devices so that working application build will not break because of a package update. Please read Yarn documentation if you are interested in more information on the topic. If you have decided to use npm, please remove this file and keep the package-lock.json instead.
Now let us take a look at the contents of the source folder.

- app is the main directory you put your application files in. Any module, component, directive, service, pipe, guard, interceptor, etc. should be placed here. You are free to choose any folder structure, but organizing Angular applications based on modules is generally a fine practice.
- home is a predefined module and acts as a welcome page. It also demonstrates how a feature-based folder structure may look like. More complex features will probably have sub-features, thus inner folders. You may change the home folder however you like.
- shared is spared for reusable code that works for several modules. Some, including yours truly, may disagree with using a single module for all shared code, so consider adding standalone sub-modules inside this folder instead of adding everything into shared.module.ts.
- app-routing.module.ts is where your top-level routes are defined. Angular is capable of lazy loading feature modules, so not all routes will be here. You may think of Angular routing as a tree and this file is the top of the tree.
- app.component.ts is essentially the top component that holds the dynamic application layout.
- app.module.ts is the root module that includes information about how parts of your application are related and what to run at the initiation of your application.
- route.provider.ts is used for modifying the menu.
- assets is for static files. A file (e.g. an image) placed in this folder will be available as is when the application is served.
- environments includes one file per environment configuration. There are two configurations by default, but you may always introduce another one. These files are directly referred to in angular.json and help you have different builds and application variables. Please refer to configuring Angular application environments for details.
- index.html is the HTML page served to visitors and will contain everything required to run your application. Servers should be configured to redirect every request to this page so that the Angular router can take over. Do not worry about how to add JavaScript and CSS files to it, because Angular CLI will do it automatically.
- main.ts bootstraps and configures Angular application to run in the browser. It is production-ready, so forget about it.
- polyfill.ts is where you can add polyfills if you want to support legacy browsers.
- style.scss is the default entry point for application styles. You can change this or add new entry points in angular.json.
- test.ts helps the unit test runner discover and bootstrap spec files.
Phew! So many files, right? Yet, most of them are typically not subject to change or, even when they are so, the CLI tooling will do the job for you. The main focus should be on the app folder and its content.
Next, we will take a look at the commands used to prepare, build, and serve our application.
How to Run the Angular Application
Now that you know about the files and folders, we can get the application up and running.
- Make sure the database migration is complete and the API is up and running.
- Run
yarnornpm installif you have not already. - Run
yarn startornpm start. The first compilation may take a while. This will start a live development server and launch your default browser in the end. - Visit the browser page that opens after the compilation 1.
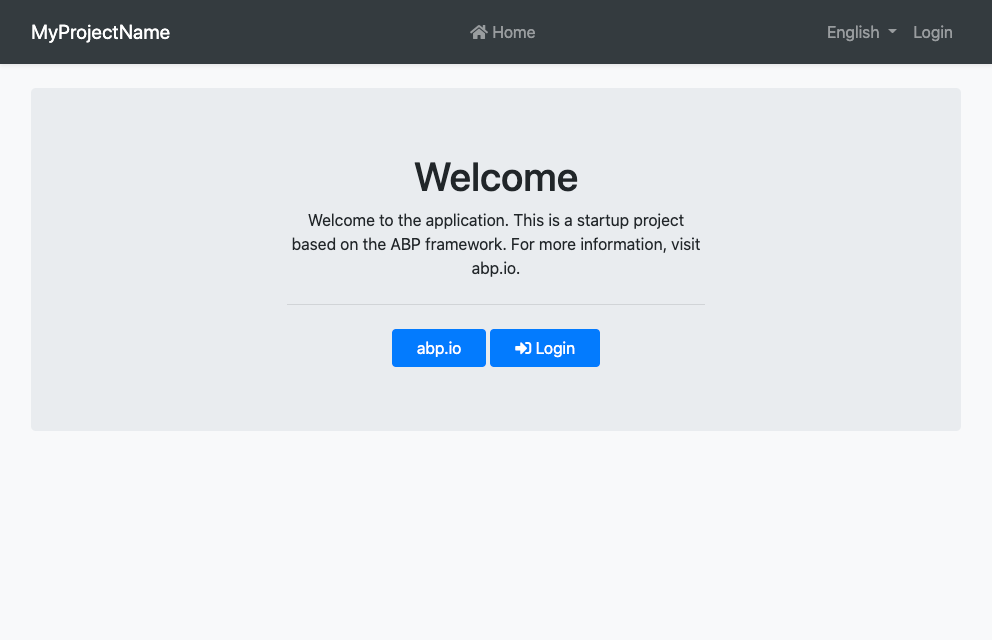
You may modify the behavior of the start script (in the package.json file) by changing the parameters passed to the ng serve command. For instance, if you do not want a browser window to open next time you run the script, remove --open from the end of it. Please check ng serve documentation for all available options.
Angular Live Development Server
The development server of Angular is based on Webpack DevServer. It tracks changes to source files and syncs the browser window after an incremental re-compilation every time 2 you make one. Your experience will be like this:
Please keep in mind that you should not use this server in production. To provide the fastest experience, the compiler skips some heavy optimizations and the development server is simply not built for multiple clients. The next section will describe what to do.

1 If you see the error above when you run the Angular app, your browser might be blocking access to the API because of the self-signed certificate. Visit that address and allow access to it (once). When you see the Swagger interface, you are good to go. ↩
2 Sometimes, depending on the file changed, Webpack may miss the change and cannot reflect it in the browser. For example, tsconfig files are not being tracked. In such a case, please restart the development server. ↩
How to Build the Angular Application
An Angular application can have multiple build targets, i.e. configurations in angular.json which define how Architect will build applications and libraries. Usually, each build configuration has a separate environment variable file. Currently, the project has two: One for development and one for production.
// this is what environment variables look like
// can be found at /src/environments/environment.ts

import { Config } from '@abp/ng.core';

const baseUrl = 'http://localhost:4200';

export const environment = {
  production: false,
  application: {
    baseUrl,
    name: 'MyProjectName',
    logoUrl: '',
  },
  oAuthConfig: {
    issuer: 'https://localhost:44381',
    redirectUri: baseUrl,
    clientId: 'MyProjectName_App',
    responseType: 'code',
    scope: 'offline_access MyProjectName',
  },
  apis: {
    default: {
      url: 'https://localhost:44381',
      rootNamespace: 'MyCompanyName.MyProjectName',
    },
  },
} as Config.Environment;
When you run the development server, variables defined in environment.ts take effect. Similarly, in production mode, the default environment is replaced by environment.prod.ts and completely different variables become effective. You may even create a new build configuration and set file replacements to use a completely new environment. For now, we will start a production build:
- Open your terminal and navigate to the root Angular folder.
- Run
yarnornpm installif you have not installed dependencies already. - Run
yarn build:prodornpm run build:prod.
Depending on project size, the compilation may take a few minutes. When it is finished, the compiled output will be placed inside the /dist folder. Voila! You have deployment-ready build artifacts.
The amount of optimization performed on the source is the main difference between a regular build and a production one. Production builds have a much smaller size and are more performant.
How to Deploy the Angular Application
Angular web applications run on the browser and require no server except for a static web server to deliver files to the client. To see that it works, please make sure the backend application is up and then run the following command in your terminal:
# please replace MyProjectName with your project name

npx servor dist/MyProjectName index.html 4200 --browse
This command will download and start a simple static server, a browser window at http://localhost:4200 will open, and the compiled output of your project will be served.
Of course, you need your application to run on an optimized web server and become available to everyone. This is quite straight-forward:
- Create a new static web server instance. You can use a service like Azure App Service, Firebase, Netlify, Vercel, or even GitHub Pages. Another option is maintaining own web server with NGINX, IIS, Apache HTTP Server, or equivalent.
- Copy the files from
dist/MyProjectName1 to a publicly served destination on the server via CLI of the service provider, SSH, or FTP (whichever is available). This step would be defined as a job if you have a CI/CD flow. - Configure the server to redirect all requests to the index.html file. Some services do that automatically. Others require you to add a file to the bundle via assets which describes the server how to do the redirections. Occasionally, you may need to do manual configuration.
In addition, you can deploy your application to certain targets using the Angular CLI. Here are some deploy targets:
1 The compiled output will be placed under /dist in a folder by the project name. ↩
 08-09 May


