Web Application Development Tutorial - Part 5: Authorization
About This Tutorial
In this tutorial series, you will build an ABP based web application named Acme.BookStore. This application is used to manage a list of books and their authors. It is developed using the following technologies:
- MongoDB as the ORM provider.
- Angular as the UI Framework.
This tutorial is organized as the following parts;
- Part 1: Creating the server side
- Part 2: The book list page
- Part 3: Creating, updating and deleting books
- Part 4: Integration tests
- Part 5: Authorization (this part)
- Part 6: Authors: Domain layer
- Part 7: Authors: Database Integration
- Part 8: Authors: Application Layer
- Part 9: Authors: User Interface
- Part 10: Book to Author Relation
Download the Source Code
This tutorial has multiple versions based on your UI and Database preferences. We've prepared a few combinations of the source code to be downloaded:
If you encounter the "filename too long" or "unzip error" on Windows, it's probably related to the Windows maximum file path limitation. Windows has a maximum file path limitation of 250 characters. To solve this, enable the long path option in Windows 10.
If you face long path errors related to Git, try the following command to enable long paths in Windows. See https://github.com/msysgit/msysgit/wiki/Git-cannot-create-a-file-or-directory-with-a-long-path
git config --system core.longpaths true
Permissions
ABP Framework provides an authorization system based on the ASP.NET Core's authorization infrastructure. One major feature added on top of the standard authorization infrastructure is the permission system which allows to define permissions and enable/disable per role, user or client.
Permission Names
A permission must have a unique name (a string). The best way is to define it as a const, so we can reuse the permission name.
Open the BookStorePermissions class inside the Acme.BookStore.Application.Contracts project (in the Permissions folder) and change the content as shown below:
namespace Acme.BookStore.Permissions
{
    public static class BookStorePermissions
    {
        public const string GroupName = "BookStore";

        public static class Books
        {
            public const string Default = GroupName + ".Books";
            public const string Create = Default + ".Create";
            public const string Edit = Default + ".Edit";
            public const string Delete = Default + ".Delete";
        }
    }
}
This is a hierarchical way of defining permission names. For example, "create book" permission name was defined as BookStore.Books.Create. ABP doesn't force you to a structure, but we find this way useful.
Permission Definitions
You should define permissions before using them.
Open the BookStorePermissionDefinitionProvider class inside the Acme.BookStore.Application.Contracts project (in the Permissions folder) and change the content as shown below:
using Acme.BookStore.Localization;
using Volo.Abp.Authorization.Permissions;
using Volo.Abp.Localization;

namespace Acme.BookStore.Permissions
{
    public class BookStorePermissionDefinitionProvider : PermissionDefinitionProvider
    {
        public override void Define(IPermissionDefinitionContext context)
        {
            var bookStoreGroup = context.AddGroup(BookStorePermissions.GroupName, L("Permission:BookStore"));

            var booksPermission = bookStoreGroup.AddPermission(BookStorePermissions.Books.Default, L("Permission:Books"));
            booksPermission.AddChild(BookStorePermissions.Books.Create, L("Permission:Books.Create"));
            booksPermission.AddChild(BookStorePermissions.Books.Edit, L("Permission:Books.Edit"));
            booksPermission.AddChild(BookStorePermissions.Books.Delete, L("Permission:Books.Delete"));
        }

        private static LocalizableString L(string name)
        {
            return LocalizableString.Create<BookStoreResource>(name);
        }
    }
}
This class defines a permission group (to group permissions on the UI, will be seen below) and 4 permissions inside this group. Also, Create, Edit and Delete are children of the BookStorePermissions.Books.Default permission. A child permission can be selected only if the parent was selected.
Finally, edit the localization file (en.json under the Localization/BookStore folder of the Acme.BookStore.Domain.Shared project) to define the localization keys used above:
"Permission:BookStore": "Book Store",
"Permission:Books": "Book Management",
"Permission:Books.Create": "Creating new books",
"Permission:Books.Edit": "Editing the books",
"Permission:Books.Delete": "Deleting the books"
Localization key names are arbitrary and there is no forcing rule. But we prefer the convention used above.
Permission Management UI
Once you define the permissions, you can see them on the permission management modal.
Go to the Administration -> Identity -> Roles page, select Permissions action for the admin role to open the permission management modal:
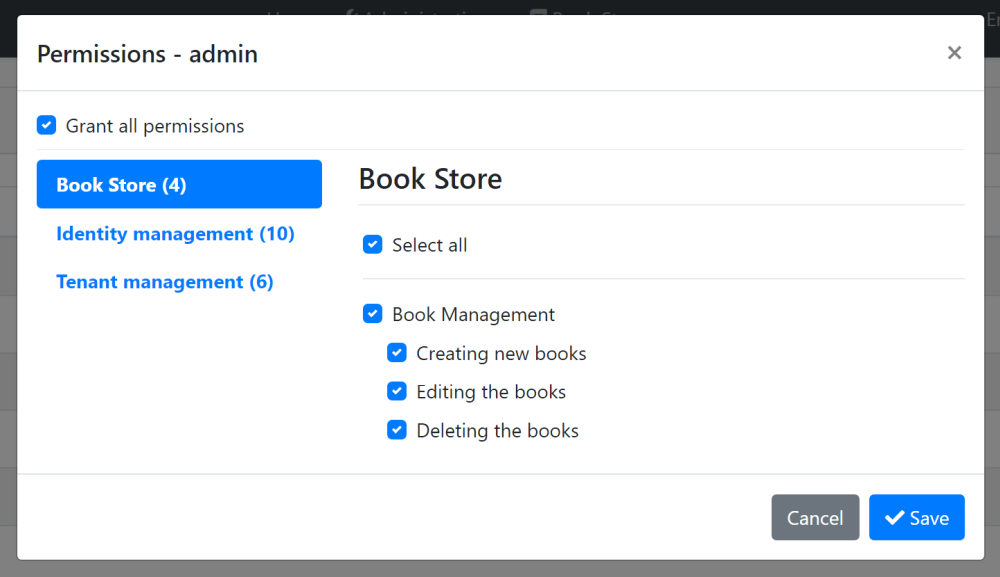
Grant the permissions you want and save the modal.
Tip: New permissions are automatically granted to the admin role if you run the
Acme.BookStore.DbMigratorapplication.
Authorization
Now, you can use the permissions to authorize the book management.
Application Layer & HTTP API
Open the BookAppService class and add set the policy names as the permission names defined above:
using System;
using Acme.BookStore.Permissions;
using Volo.Abp.Application.Dtos;
using Volo.Abp.Application.Services;
using Volo.Abp.Domain.Repositories;

namespace Acme.BookStore.Books
{
    public class BookAppService :
        CrudAppService<
            Book, //The Book entity
            BookDto, //Used to show books
            Guid, //Primary key of the book entity
            PagedAndSortedResultRequestDto, //Used for paging/sorting
            CreateUpdateBookDto>, //Used to create/update a book
        IBookAppService //implement the IBookAppService
    {
        public BookAppService(IRepository<Book, Guid> repository)
            : base(repository)
        {
            GetPolicyName = BookStorePermissions.Books.Default;
            GetListPolicyName = BookStorePermissions.Books.Default;
            CreatePolicyName = BookStorePermissions.Books.Create;
            UpdatePolicyName = BookStorePermissions.Books.Edit;
            DeletePolicyName = BookStorePermissions.Books.Delete;
        }
    }
}
Added code to the constructor. Base CrudAppService automatically uses these permissions on the CRUD operations. This makes the application service secure, but also makes the HTTP API secure since this service is automatically used as an HTTP API as explained before (see auto API controllers).
You will see the declarative authorization, using the
[Authorize(...)]attribute, later while developing the author management functionality.
Angular Guard Configuration
First step of the UI is to prevent unauthorized users to see the "Books" menu item and enter to the book management page.
Open the /src/app/book/book-routing.module.ts and replace with the following content:
import { NgModule } from '@angular/core';
import { Routes, RouterModule } from '@angular/router';
import { AuthGuard, PermissionGuard } from '@abp/ng.core';
import { BookComponent } from './book.component';

const routes: Routes = [
  { path: '', component: BookComponent, canActivate: [AuthGuard, PermissionGuard] },
];

@NgModule({
  imports: [RouterModule.forChild(routes)],
  exports: [RouterModule],
})
export class BookRoutingModule {}
- Imported
AuthGuardandPermissionGuardfrom the@abp/ng.core. - Added
canActivate: [AuthGuard, PermissionGuard]to the route definition.
Open the /src/app/route.provider.ts and add requiredPolicy: 'BookStore.Books' to the /books route. The /books route block should be following:
{
  path: '/books',
  name: '::Menu:Books',
  parentName: '::Menu:BookStore',
  layout: eLayoutType.application,
  requiredPolicy: 'BookStore.Books',
}
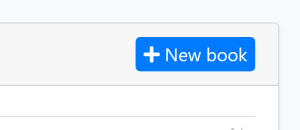
Hide the New Book Button
The book management page has a New Book button that should be invisible if the current user has no Book Creation permission.
Open the /src/app/book/book.component.html file and replace the create button HTML content as shown below:
<!-- Add the abpPermission directive -->
<button *abpPermission="'BookStore.Books.Create'" id="create" class="btn btn-primary" type="button" (click)="createBook()">
  <i class="fa fa-plus mr-1"></i>
  <span>{{ '::NewBook' | abpLocalization }}</span>
</button>
- Just added
*abpPermission="'BookStore.Books.Create'"that hides the button if the current user has no permission.
Hide the Edit and Delete Actions
Books table in the book management page has an actions button for each row. The actions button includes Edit and Delete actions:
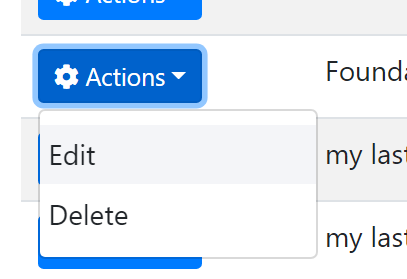
We should hide an action if the current user has not granted for the related permission.
Open the /src/app/book/book.component.html file and replace the edit and delete buttons contents as shown below:
<!-- Add the abpPermission directive -->
<button *abpPermission="'BookStore.Books.Edit'" ngbDropdownItem (click)="editBook(row.id)">
  {{ '::Edit' | abpLocalization }}
</button>

<!-- Add the abpPermission directive -->
<button *abpPermission="'BookStore.Books.Delete'" ngbDropdownItem (click)="delete(row.id)">
  {{ '::Delete' | abpLocalization }}
</button>
- Added
*abpPermission="'BookStore.Books.Edit'"that hides the edit action if the current user has no editing permission. - Added
*abpPermission="'BookStore.Books.Delete'"that hides the delete action if the current user has no delete permission.
The Next Part
See the next part of this tutorial.
 08-09 May


