Widgets
ABP provides a model and infrastructure to create reusable widgets. Widget system is an extension to ASP.NET Core's ViewComponents. Widgets are especially useful when you want to;
- Have scripts & styles dependencies for your widget.
- Create dashboards with widgets used inside.
- Define widgets in reusable modules.
- Co-operate widgets with authorization and bundling systems.
Basic Widget Definition
Create a View Component
As the first step, create a new regular ASP.NET Core View Component:
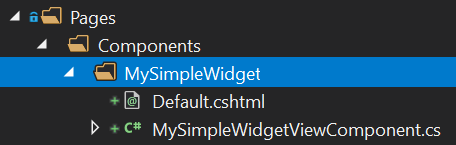
MySimpleWidgetViewComponent.cs:
using Microsoft.AspNetCore.Mvc;
using Volo.Abp.AspNetCore.Mvc;

namespace DashboardDemo.Web.Pages.Components.MySimpleWidget
{
    public class MySimpleWidgetViewComponent : AbpViewComponent
    {
        public IViewComponentResult Invoke()
        {
            return View();
        }
    }
}
Inheriting from AbpViewComponent is not required. You could inherit from ASP.NET Core's standard ViewComponent. AbpViewComponent only defines some base useful properties.
You can inject a service and use in the Invoke method to get some data from the service. You may need to make Invoke method async, like public async Task<IViewComponentResult> InvokeAsync(). See ASP.NET Core's ViewComponents document fore all different usages.
Default.cshtml:
<div class="my-simple-widget">
    <h2>My Simple Widget</h2>
    <p>This is a simple widget!</p>
</div>
Define the Widget
Add a Widget attribute to the MySimpleWidgetViewComponent class to mark this view component as a widget:
using Microsoft.AspNetCore.Mvc;
using Volo.Abp.AspNetCore.Mvc;
using Volo.Abp.AspNetCore.Mvc.UI.Widgets;

namespace DashboardDemo.Web.Pages.Components.MySimpleWidget
{
    [Widget]
    public class MySimpleWidgetViewComponent : AbpViewComponent
    {
        public IViewComponentResult Invoke()
        {
            return View();
        }
    }
}
Rendering a Widget
Rendering a widget is pretty standard. Use the Component.InvokeAsync method in a razor view/page as you do for any view component. Examples:
@await Component.InvokeAsync("MySimpleWidget")
@await Component.InvokeAsync(typeof(MySimpleWidgetViewComponent))
First approach uses the widget name while second approach uses the view component type.
Widgets with Arguments
ASP.NET Core's view component system allows you to accept arguments for view components. The sample view component below accepts startDate and endDate and uses these arguments to retrieve data from a service.
using System;
using System.Threading.Tasks;
using Microsoft.AspNetCore.Mvc;
using Volo.Abp.AspNetCore.Mvc;
using Volo.Abp.AspNetCore.Mvc.UI.Widgets;

namespace DashboardDemo.Web.Pages.Shared.Components.CountersWidget
{
    [Widget]
    public class CountersWidgetViewComponent : AbpViewComponent
    {
        private readonly IDashboardAppService _dashboardAppService;

        public CountersWidgetViewComponent(IDashboardAppService dashboardAppService)
        {
            _dashboardAppService = dashboardAppService;
        }

        public async Task<IViewComponentResult> InvokeAsync(
            DateTime startDate, DateTime endDate)
        {
            var result = await _dashboardAppService.GetCountersWidgetAsync(
                new CountersWidgetInputDto
                {
                    StartDate = startDate,
                    EndDate = endDate
                }
            );

            return View(result);
        }
    }
}
Now, you need to pass an anonymous object to pass arguments as shown below:
@await Component.InvokeAsync("CountersWidget", new
{
    startDate = DateTime.Now.Subtract(TimeSpan.FromDays(7)),
    endDate = DateTime.Now
})
Widget Name
Default name of the view components are calculated based on the name of the view component type. If your view component type is MySimpleWidgetViewComponent then the widget name will be MySimpleWidget (removes ViewComponent postfix). This is how ASP.NET Core calculates a view component's name.
To customize widget's name, just use the standard ViewComponent attribute of ASP.NET Core:
using Microsoft.AspNetCore.Mvc;
using Volo.Abp.AspNetCore.Mvc;
using Volo.Abp.AspNetCore.Mvc.UI.Widgets;

namespace DashboardDemo.Web.Pages.Components.MySimpleWidget
{
    [Widget]
    [ViewComponent(Name = "MyCustomNamedWidget")]
    public class MySimpleWidgetViewComponent : AbpViewComponent
    {
        public IViewComponentResult Invoke()
        {
            return View("~/Pages/Components/MySimpleWidget/Default.cshtml");
        }
    }
}
ABP will respect to the custom name by handling the widget.
If the view component name and the folder name of the view component don't match, you may need to manually write the view path as done in this example.
Display Name
You can also define a human-readable, localizable display name for the widget. This display name then can be used on the UI when needed. Display name is optional and can be defined using properties of the Widget attribute:
using DashboardDemo.Localization;
using Microsoft.AspNetCore.Mvc;
using Volo.Abp.AspNetCore.Mvc;
using Volo.Abp.AspNetCore.Mvc.UI.Widgets;

namespace DashboardDemo.Web.Pages.Components.MySimpleWidget
{
    [Widget(
        DisplayName = "MySimpleWidgetDisplayName", //Localization key
        DisplayNameResource = typeof(DashboardDemoResource) //localization resource
        )]
    public class MySimpleWidgetViewComponent : AbpViewComponent
    {
        public IViewComponentResult Invoke()
        {
            return View();
        }
    }
}
See the localization document to learn about localization resources and keys.
Style & Script Dependencies
There are some challenges when your widget has script and style files;
- Any page uses the widget should also include the its script & styles files into the page.
- The page should also care about depended libraries/files of the widget.
ABP solves these issues when you properly relate the resources with the widget. You don't care about dependencies of the widget while using it.
Defining as Simple File Paths
The example widget below adds a style and a script file:
using Microsoft.AspNetCore.Mvc;
using Volo.Abp.AspNetCore.Mvc;
using Volo.Abp.AspNetCore.Mvc.UI.Widgets;

namespace DashboardDemo.Web.Pages.Components.MySimpleWidget
{
    [Widget(
        StyleFiles = new[] { "/Pages/Components/MySimpleWidget/Default.css" },
        ScriptFiles = new[] { "/Pages/Components/MySimpleWidget/Default.js" }
        )]
    public class MySimpleWidgetViewComponent : AbpViewComponent
    {
        public IViewComponentResult Invoke()
        {
            return View();
        }
    }
}
ABP takes account these dependencies and properly adds to the view/page when you use the widget. Style/script files can be physical or virtual. It is completely integrated to the Virtual File System.
Defining Bundle Contributors
All resources for used widgets in a page are added as a bundle (bundled & minified in production if you don't configure otherwise). In addition to adding a simple file, you can take full power of the bundle contributors.
The sample code below does the same with the code above, but defines and uses bundle contributors:
using System.Collections.Generic;
using Microsoft.AspNetCore.Mvc;
using Volo.Abp.AspNetCore.Mvc;
using Volo.Abp.AspNetCore.Mvc.UI.Bundling;
using Volo.Abp.AspNetCore.Mvc.UI.Widgets;

namespace DashboardDemo.Web.Pages.Components.MySimpleWidget
{
    [Widget(
        StyleTypes = new []{ typeof(MySimpleWidgetStyleBundleContributor) },
        ScriptTypes = new[]{ typeof(MySimpleWidgetScriptBundleContributor) }
        )]
    public class MySimpleWidgetViewComponent : AbpViewComponent
    {
        public IViewComponentResult Invoke()
        {
            return View();
        }
    }

    public class MySimpleWidgetStyleBundleContributor : BundleContributor
    {
        public override void ConfigureBundle(BundleConfigurationContext context)
        {
            context.Files
              .AddIfNotContains("/Pages/Components/MySimpleWidget/Default.css");
        }
    }

    public class MySimpleWidgetScriptBundleContributor : BundleContributor
    {
        public override void ConfigureBundle(BundleConfigurationContext context)
        {
            context.Files
              .AddIfNotContains("/Pages/Components/MySimpleWidget/Default.js");
        }
    }
}
Bundle contribution system is very powerful. If your widget uses a JavaScript library to render a chart, then you can declare it as a dependency, so the JavaScript library is automatically added to the page if it wasn't added before. In this way, the page using your widget doesn't care about the dependencies.
See the bundling & minification documentation for more information about that system.
RefreshUrl
A widget may design a RefreshUrl that is used whenever the widget needs to be refreshed. If it is defined, the widget is re-rendered on the server side on every refresh (see the refresh method of the WidgetManager below).
[Widget(RefreshUrl = "Widgets/Counters")]
public class CountersWidgetViewComponent : AbpViewComponent
{

}
Once you define a RefreshUrl for your widget, you need to provide an endpoint to render and return it:
[Route("Widgets")]
public class CountersWidgetController : AbpController
{
    [HttpGet]
    [Route("Counters")]
    public IActionResult Counters(DateTime startDate, DateTime endDate)
    {
        return ViewComponent("CountersWidget", new {startDate, endDate});
    }
}
Widgets/Counters route matches to the RefreshUrl declared before.
A widget supposed to be refreshed in two ways: In the first way, when you use a
RefreshUrl, it re-rendered on the server and replaced by the HTML returned from server. In the second way the widget gets data (generally a JSON object) from server and refreshes itself in the client side (see the refresh method in the Widget JavaScript API section).
AutoInitialize
WidgetAttribute has an AutoInitialize property (bool) that can be set to automatically initialize a widget on page ready & whenever the widget is added to the DOM. The default value is false.
If a widget is configured to be auto initialized, then a WidgetManager (see below) automatically created and initialized for instances of this widget. This is useful when the widget instances are not grouped and separately works (they don't require to init or refresh together).
Setting the AutoInitialize to true is equivalent to write such a code yourself:
$('.abp-widget-wrapper[data-widget-name="MySimpleWidget"]')
    .each(function () {
        var widgetManager = new abp.WidgetManager({
            wrapper: $(this),
        });

        widgetManager.init($(this));
    });
AutoInitializealso supports widgets loaded/refreshed via AJAX (added to the DOM later) and/or used in a nested way (a widget inside another widget). If you don't need to group multiple widgets and control with a singleWidgetManager,AutoInitializeis the recommended approach.
JavaScript API
A widget may need to be rendered and refreshed in the client side. In such cases, you can use ABP's WidgetManager and define APIs for your widgets.
WidgetManager
WidgetManager is used to initialize and refresh one or more widgets. Create a new WidgetManager as shown below:
$(function() {
    var myWidgetManager = new abp.WidgetManager('#MyDashboardWidgetsArea');
})
MyDashboardWidgetsArea may contain one or more widgets inside.
Using the
WidgetManagerinside document.ready (like above) is a good practice since its functions use the DOM and need DOM to be ready.
WidgetManager.init()
init simply initializes the WidgetManager and calls init methods of the related widgets if they define (see Widget JavaScript API section below)
myWidgetManager.init();
WidgetManager.refresh()
refresh method refreshes all widgets related to this WidgetManager:
myWidgetManager.refresh();
WidgetManager Options
WidgetManager has some additional options.
Filter Form
If your widgets require parameters/filters then you will generally have a form to filter the widgets. In such cases, you can create a form that has some form elements and a dashboard area with some widgets inside. Example:
<form method="get" id="MyDashboardFilterForm">
    ...form elements
</form>

<div id="MyDashboardWidgetsArea" data-widget-filter="#MyDashboardFilterForm">
   ...widgets
</div>
data-widget-filter attribute relates the form with the widgets. Whenever the form is submitted, all the widgets are automatically refreshed with the form fields as the filter.
Instead of the data-widget-filter attribute, you can use the filterForm parameter of the WidgetManager constructor. Example:
var myWidgetManager = new abp.WidgetManager({
    wrapper: '#MyDashboardWidgetsArea',
    filterForm: '#MyDashboardFilterForm'
});
Filter Callback
You may want to have a better control to provide filters while initializing and refreshing the widgets. In this case, you can use the filterCallback option:
var myWidgetManager = new abp.WidgetManager({
    wrapper: '#MyDashboardWidgetsArea',
    filterCallback: function() {
        return $('#MyDashboardFilterForm').serializeFormToObject();
    }
});
This example shows the default implementation of the filterCallback. You can return any JavaScript object with fields. Example:
filterCallback: function() {
    return {
        'startDate': $('#StartDateInput').val(),
        'endDate': $('#EndDateInput').val()
    };
}
The returning filters are passed to all widgets on init and refresh.
Widget JavaScript API
A widget can define a JavaScript API that is invoked by the WidgetManager when needed. The code sample below can be used to start to define an API for a widget.
(function () {
    abp.widgets.NewUserStatisticWidget = function ($wrapper) {

        var getFilters = function () {
            return {
                ...
            };
        }

        var refresh = function (filters) {
            ...
        };

        var init = function (filters) {
            ...
        };

        return {
            getFilters: getFilters,
            init: init,
            refresh: refresh
        };
    };
})();
NewUserStatisticWidget is the name of the widget here. It should match the widget name defined in the server side. All of the functions are optional.
getFilters
If the widget has internal custom filters, this function should return the filter object. Example:
var getFilters = function() {
    return {
        frequency: $wrapper.find('.frequency-filter option:selected').val()
    };
}
This method is used by the WidgetManager while building filters.
init
Used to initialize the widget when needed. It has a filter argument that can be used while getting data from server. init method is used when WidgetManager.init() function is called. It is also called if your widget requires a full re-load on refresh. See the RefreshUrl widget option.
refresh
Used to refresh the widget when needed. It has a filter argument that can be used while getting data from server. refresh method is used whenever WidgetManager.refresh() function is called.
Authorization
Some widgets may need to be available only for authenticated or authorized users. In this case, use the following properties of the Widget attribute:
RequiresAuthentication(bool): Set to true to make this widget usable only for authentication users (user have logged in to the application).RequiredPolicies(List<string>): A list of policy names to authorize the user. See the authorization document for more info about policies.
Example:
using Microsoft.AspNetCore.Mvc;
using Volo.Abp.AspNetCore.Mvc;
using Volo.Abp.AspNetCore.Mvc.UI.Widgets;

namespace DashboardDemo.Web.Pages.Components.MySimpleWidget
{
    [Widget(RequiredPolicies = new[] { "MyPolicyName" })]
    public class MySimpleWidgetViewComponent : AbpViewComponent
    {
        public IViewComponentResult Invoke()
        {
            return View();
        }
    }
}
WidgetOptions
As alternative to the Widget attribute, you can use the AbpWidgetOptions to configure widgets:
Configure<AbpWidgetOptions>(options =>
{
    options.Widgets.Add<MySimpleWidgetViewComponent>();
});
Write this into the ConfigureServices method of your module. All the configuration done with the Widget attribute is also possible with the AbpWidgetOptions. Example configuration that adds a style for the widget:
Configure<AbpWidgetOptions>(options =>
{
    options.Widgets
        .Add<MySimpleWidgetViewComponent>()
        .WithStyles("/Pages/Components/MySimpleWidget/Default.css");
});
Tip:
AbpWidgetOptionscan also be used to get an existing widget and change its configuration. This is especially useful if you want to modify the configuration of a widget inside a module used by your application. Useoptions.Widgets.Findto get an existingWidgetDefinition.
 08-09 May


