Web Application Development Tutorial - Part 3: Creating, Updating and Deleting Books
About This Tutorial
In this tutorial series, you will build an ABP based web application named Acme.BookStore. This application is used to manage a list of books and their authors. It is developed using the following technologies:
- Entity Framework Core as the ORM provider.
- Angular as the UI Framework.
This tutorial is organized as the following parts:
- Part 1: Creating the server side
- Part 2: The book list page
- Part 3: Creating, updating and deleting books (this part)
- Part 4: Integration tests
- Part 5: Authorization
- Part 6: Authors: Domain layer
- Part 7: Authors: Database Integration
- Part 8: Authors: Application Layer
- Part 9: Authors: User Interface
- Part 10: Book to Author Relation
Download the Source Code
This tutorial has multiple versions based on your UI and Database preferences. We've prepared a few combinations of the source code to be downloaded:
If you encounter the "filename too long" or "unzip" error on Windows, please see this guide.
Creating a New Book
In this section, you will learn how to create a new modal dialog form to create a new book.
BookComponent
Open /src/app/book/book.component.ts and replace the content as below:
import { ListService, PagedResultDto } from '@abp/ng.core';
import { Component, OnInit } from '@angular/core';
import { BookService, BookDto } from '@proxy/books';

@Component({
  selector: 'app-book',
  templateUrl: './book.component.html',
  styleUrls: ['./book.component.scss'],
  providers: [ListService],
})
export class BookComponent implements OnInit {
  book = { items: [], totalCount: 0 } as PagedResultDto<BookDto>;

  isModalOpen = false; // add this line

  constructor(public readonly list: ListService, private bookService: BookService) {}

  ngOnInit() {
    const bookStreamCreator = (query) => this.bookService.getList(query);

    this.list.hookToQuery(bookStreamCreator).subscribe((response) => {
      this.book = response;
    });
  }

  // add new method
  createBook() {
    this.isModalOpen = true;
  }
}
- We defined a property called
isModalOpenand a method calledcreateBook.
Open /src/app/book/book.component.html and make the following changes:
<div class="card">
  <div class="card-header">
    <div class="row">
      <div class="col col-md-6">
        <h5 class="card-title">{{ '::Menu:Books' | abpLocalization }}</h5>
      </div>
      <div class="text-end col col-md-6">

        <!-- Add the "new book" button here -->
        <div class="text-lg-end pt-2">
          <button id="create" class="btn btn-primary" type="button" (click)="createBook()">
            <i class="fa fa-plus me-1"></i>
            <span>{{ "::NewBook" | abpLocalization }}</span>
          </button>
        </div>

      </div>
    </div>
  </div>
  <div class="card-body">
    <!-- ngx-datatable should be here! -->
  </div>
</div>

<!-- Add the modal here -->
<abp-modal [(visible)]="isModalOpen">
  <ng-template #abpHeader>
    <h3>{{ '::NewBook' | abpLocalization }}</h3>
  </ng-template>

  <ng-template #abpBody> </ng-template>

  <ng-template #abpFooter>
    <button type="button" class="btn btn-secondary" abpClose>
      {{ '::Close' | abpLocalization }}
    </button>
  </ng-template>
</abp-modal>
- Added a
New bookbutton to the card header.. - Added the
abp-modalwhich renders a modal to allow user to create a new book.abp-modalis a pre-built component to show modals. While you could use another approach to show a modal,abp-modalprovides additional benefits.
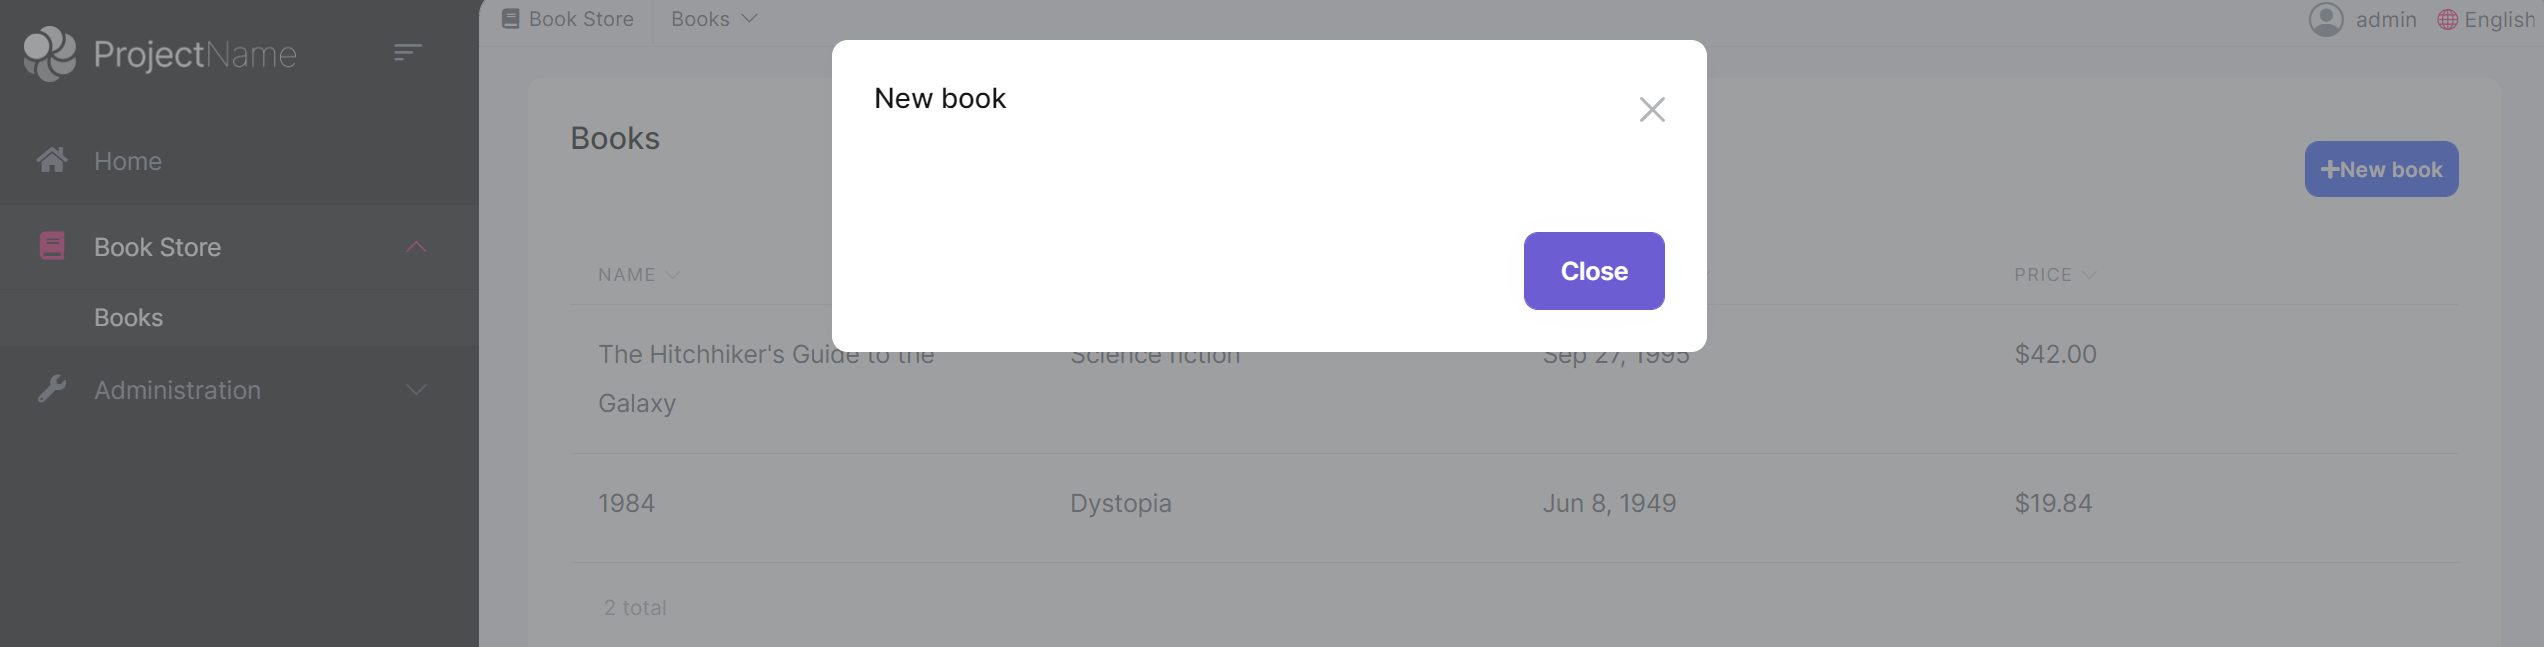
You can open your browser and click the New book button to see the new modal.
Create a Reactive Form
Reactive forms provide a model-driven approach to handling form inputs whose values change over time.
Open /src/app/book/book.component.ts and replace the content as below:
import { ListService, PagedResultDto } from '@abp/ng.core';
import { Component, OnInit } from '@angular/core';
import { BookService, BookDto, bookTypeOptions } from '@proxy/books'; // add bookTypeOptions
import { FormGroup, FormBuilder, Validators } from '@angular/forms'; // add this

@Component({
  selector: 'app-book',
  templateUrl: './book.component.html',
  styleUrls: ['./book.component.scss'],
  providers: [ListService],
})
export class BookComponent implements OnInit {
  book = { items: [], totalCount: 0 } as PagedResultDto<BookDto>;

  form: FormGroup; // add this line

  // add bookTypes as a list of BookType enum members
  bookTypes = bookTypeOptions;

  isModalOpen = false;

  constructor(
    public readonly list: ListService,
    private bookService: BookService,
    private fb: FormBuilder // inject FormBuilder
  ) {}

  ngOnInit() {
    const bookStreamCreator = (query) => this.bookService.getList(query);

    this.list.hookToQuery(bookStreamCreator).subscribe((response) => {
      this.book = response;
    });
  }

  createBook() {
    this.buildForm(); // add this line
    this.isModalOpen = true;
  }

  // add buildForm method
  buildForm() {
    this.form = this.fb.group({
      name: ['', Validators.required],
      type: [null, Validators.required],
      publishDate: [null, Validators.required],
      price: [null, Validators.required],
    });
  }

  // add save method
  save() {
    if (this.form.invalid) {
      return;
    }

    this.bookService.create(this.form.value).subscribe(() => {
      this.isModalOpen = false;
      this.form.reset();
      this.list.get();
    });
  }
}
- Imported
FormGroup,FormBuilderandValidatorsfrom@angular/forms. - Added a
form: FormGroupproperty. - Added a
bookTypesproperty as a list ofBookTypeenum members. That will be used in form options. - Injected
FormBuilderinto the constructor. FormBuilder provides convenient methods for generating form controls. It reduces the amount of boilerplate needed to build complex forms. - Added a
buildFormmethod to the end of the file and executed thebuildForm()in thecreateBookmethod. - Added a
savemethod.
Open /src/app/book/book.component.html and replace <ng-template #abpBody> </ng-template> with the following code part:
<ng-template #abpBody>
  <form [formGroup]="form" (ngSubmit)="save()">
    <div class="mt-2">
      <label for="book-name">Name</label><span> * </span>
      <input type="text" id="book-name" class="form-control" formControlName="name" autofocus />
    </div>

    <div class="mt-2">
      <label for="book-price">Price</label><span> * </span>
      <input type="number" id="book-price" class="form-control" formControlName="price" />
    </div>

    <div class="mt-2">
      <label for="book-type">Type</label><span> * </span>
      <select class="form-control" id="book-type" formControlName="type">
        <option [ngValue]="null">Select a book type</option>
        <option [ngValue]="type.value" *ngFor="let type of bookTypes"> {{ '::Enum:BookType.' + type.value | abpLocalization }}</option>
      </select>
    </div>

    <div class="mt-2">
      <label>Publish date</label><span> * </span>
      <input
        #datepicker="ngbDatepicker"
        class="form-control"
        name="datepicker"
        formControlName="publishDate"
        ngbDatepicker
        (click)="datepicker.toggle()"
      />
    </div>
  </form>
</ng-template>
Also replace <ng-template #abpFooter> </ng-template> with the following code part:
<ng-template #abpFooter>
  <button type="button" class="btn btn-secondary" abpClose>
      {{ '::Close' | abpLocalization }}
  </button>

  <!--added save button-->
  <button class="btn btn-primary" (click)="save()" [disabled]="form.invalid">
        <i class="fa fa-check mr-1"></i>
        {{ '::Save' | abpLocalization }}
  </button>
</ng-template>
Datepicker
We've used NgBootstrap datepicker in this component. So, we need to arrange the dependencies related to this component.
Open /src/app/book/book.module.ts and replace the content as below:
import { NgModule } from '@angular/core';
import { SharedModule } from '../shared/shared.module';
import { BookRoutingModule } from './book-routing.module';
import { BookComponent } from './book.component';
import { NgbDatepickerModule } from '@ng-bootstrap/ng-bootstrap'; // add this line

@NgModule({
  declarations: [BookComponent],
  imports: [
    BookRoutingModule,
    SharedModule,
    NgbDatepickerModule, // add this line
  ]
})
export class BookModule { }
- We imported
NgbDatepickerModuleto be able to use the date picker.
Open /src/app/book/book.component.ts and replace the content as below:
import { ListService, PagedResultDto } from '@abp/ng.core';
import { Component, OnInit } from '@angular/core';
import { BookService, BookDto, bookTypeOptions } from '@proxy/books';
import { FormGroup, FormBuilder, Validators } from '@angular/forms';

// added this line
import { NgbDateNativeAdapter, NgbDateAdapter } from '@ng-bootstrap/ng-bootstrap';

@Component({
  selector: 'app-book',
  templateUrl: './book.component.html',
  styleUrls: ['./book.component.scss'],
  providers: [
    ListService,
    { provide: NgbDateAdapter, useClass: NgbDateNativeAdapter } // add this line
  ],
})
export class BookComponent implements OnInit {
  book = { items: [], totalCount: 0 } as PagedResultDto<BookDto>;

  form: FormGroup;

  bookTypes = bookTypeOptions;

  isModalOpen = false;

  constructor(
    public readonly list: ListService,
    private bookService: BookService,
    private fb: FormBuilder
  ) {}

  ngOnInit() {
    const bookStreamCreator = (query) => this.bookService.getList(query);

    this.list.hookToQuery(bookStreamCreator).subscribe((response) => {
      this.book = response;
    });
  }

  createBook() {
    this.buildForm();
    this.isModalOpen = true;
  }

  buildForm() {
    this.form = this.fb.group({
      name: ['', Validators.required],
      type: [null, Validators.required],
      publishDate: [null, Validators.required],
      price: [null, Validators.required],
    });
  }

  save() {
    if (this.form.invalid) {
      return;
    }

    this.bookService.create(this.form.value).subscribe(() => {
      this.isModalOpen = false;
      this.form.reset();
      this.list.get();
    });
  }
}
- Imported
NgbDateNativeAdapterandNgbDateAdapter. - We added a new provider
NgbDateAdapterthat converts the Datepicker value toDatetype. Check out the datepicker adapters for more details.
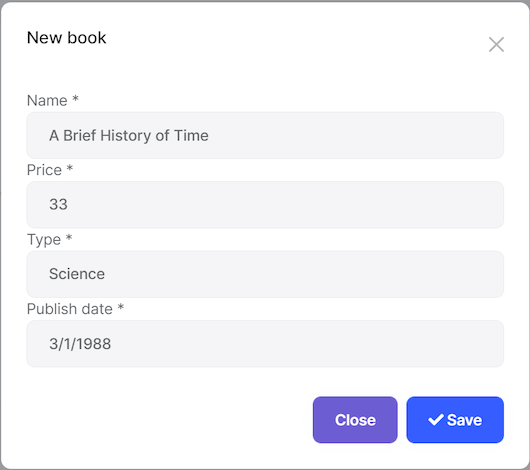
Now, you can open your browser to see the changes:
Updating a Book
Open /src/app/book/book.component.ts and replace the content as shown below:
import { ListService, PagedResultDto } from '@abp/ng.core';
import { Component, OnInit } from '@angular/core';
import { BookService, BookDto, bookTypeOptions } from '@proxy/books';
import { FormGroup, FormBuilder, Validators } from '@angular/forms';
import { NgbDateNativeAdapter, NgbDateAdapter } from '@ng-bootstrap/ng-bootstrap';

@Component({
  selector: 'app-book',
  templateUrl: './book.component.html',
  styleUrls: ['./book.component.scss'],
  providers: [ListService, { provide: NgbDateAdapter, useClass: NgbDateNativeAdapter }],
})
export class BookComponent implements OnInit {
  book = { items: [], totalCount: 0 } as PagedResultDto<BookDto>;

  selectedBook = {} as BookDto; // declare selectedBook

  form: FormGroup;

  bookTypes = bookTypeOptions;

  isModalOpen = false;

  constructor(
    public readonly list: ListService,
    private bookService: BookService,
    private fb: FormBuilder
  ) {}

  ngOnInit() {
    const bookStreamCreator = (query) => this.bookService.getList(query);

    this.list.hookToQuery(bookStreamCreator).subscribe((response) => {
      this.book = response;
    });
  }

  createBook() {
    this.selectedBook = {} as BookDto; // reset the selected book
    this.buildForm();
    this.isModalOpen = true;
  }

  // Add editBook method
  editBook(id: string) {
    this.bookService.get(id).subscribe((book) => {
      this.selectedBook = book;
      this.buildForm();
      this.isModalOpen = true;
    });
  }

  buildForm() {
    this.form = this.fb.group({
      name: [this.selectedBook.name || '', Validators.required],
      type: [this.selectedBook.type || null, Validators.required],
      publishDate: [
        this.selectedBook.publishDate ? new Date(this.selectedBook.publishDate) : null,
        Validators.required,
      ],
      price: [this.selectedBook.price || null, Validators.required],
    });
  }

  // change the save method
  save() {
    if (this.form.invalid) {
      return;
    }

    const request = this.selectedBook.id
      ? this.bookService.update(this.selectedBook.id, this.form.value)
      : this.bookService.create(this.form.value);

    request.subscribe(() => {
      this.isModalOpen = false;
      this.form.reset();
      this.list.get();
    });
  }
}
- We declared a variable named
selectedBookasBookDto. - We added an
editBookmethod. This method fetches the book with the givenidand sets it toselectedBookobject. - We replaced the
buildFormmethod so that it creates the form with theselectedBookdata. - We replaced the
createBookmethod so it setsselectedBookto an empty object. - We changed the
savemethod to handle both of create and update operations.
Add "Actions" Dropdown to the Table
Open /src/app/book/book.component.html and add the following ngx-datatable-column definition as the first column in the ngx-datatable:
<ngx-datatable-column
  [name]="'::Actions' | abpLocalization"
  [maxWidth]="150"
  [sortable]="false"
>
  <ng-template let-row="row" ngx-datatable-cell-template>
    <div ngbDropdown container="body" class="d-inline-block">
      <button
        class="btn btn-primary btn-sm dropdown-toggle"
        data-toggle="dropdown"
        aria-haspopup="true"
        ngbDropdownToggle
      >
        <i class="fa fa-cog me-1"></i>{{ '::Actions' | abpLocalization }}
      </button>
      <div ngbDropdownMenu>
        <button ngbDropdownItem (click)="editBook(row.id)">
          {{ '::Edit' | abpLocalization }}
        </button>
      </div>
    </div>
  </ng-template>
</ngx-datatable-column>
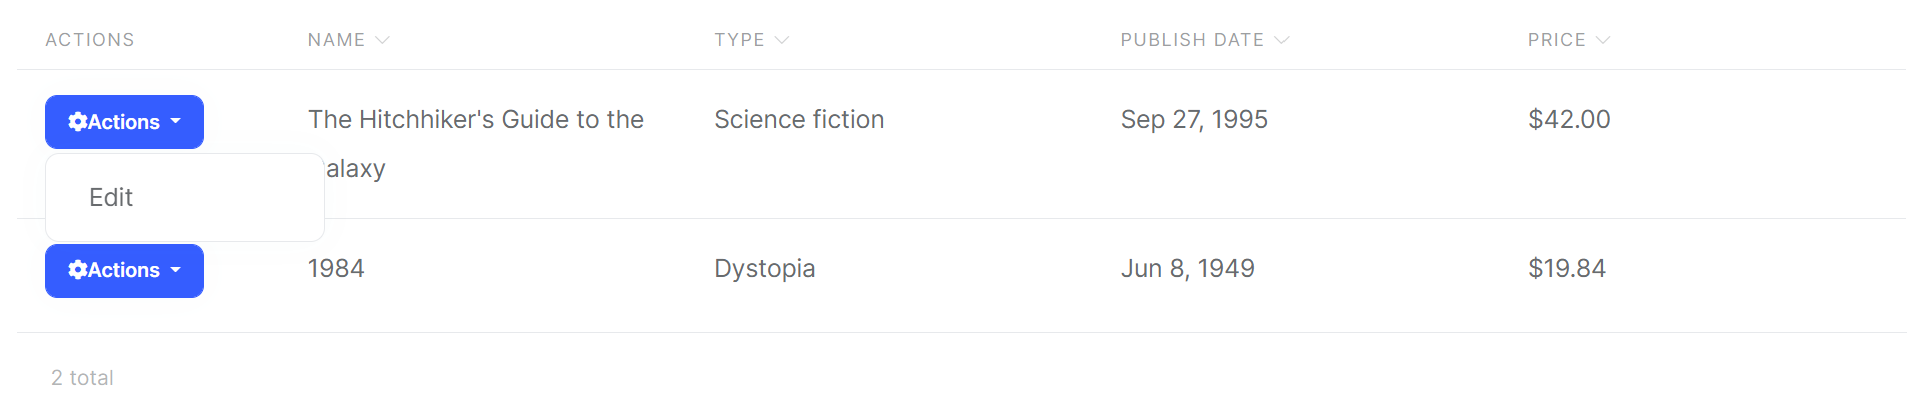
Added an "Actions" dropdown as the first column of the table that is shown below:
Also, change the ng-template #abpHeader section as shown below:
<ng-template #abpHeader>
    <h3>{{ (selectedBook.id ? '::Edit' : '::NewBook' ) | abpLocalization }}</h3>
</ng-template>
This template will show the Edit text for edit record operation, New Book for new record operation in the title.
Deleting a Book
Open the /src/app/book/book.component.ts file and inject the ConfirmationService.
Replace the constructor as below:
// ...

// add new imports
import { ConfirmationService, Confirmation } from '@abp/ng.theme.shared';

//change the constructor
constructor(
  public readonly list: ListService,
  private bookService: BookService,
  private fb: FormBuilder,
  private confirmation: ConfirmationService // inject the ConfirmationService
) {}

// Add a delete method
delete(id: string) {
  this.confirmation.warn('::AreYouSureToDelete', '::AreYouSure').subscribe((status) => {
    if (status === Confirmation.Status.confirm) {
      this.bookService.delete(id).subscribe(() => this.list.get());
    }
  });
}
- We imported
ConfirmationService. - We injected
ConfirmationServiceto the constructor. - Added a
deletemethod.
Check out the Confirmation Popup documentation for more about this service.
Add a Delete Button
Open /src/app/book/book.component.html and modify the ngbDropdownMenu to add the delete button as shown below:
<div ngbDropdownMenu>
  <!-- add the Delete button -->
    <button ngbDropdownItem (click)="delete(row.id)">
        {{ '::Delete' | abpLocalization }}
    </button>
</div>
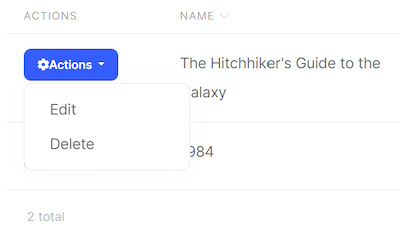
The final actions dropdown UI looks like below:
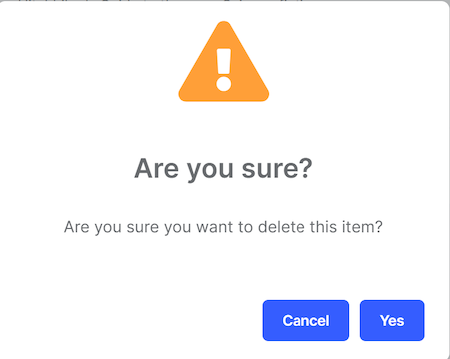
Clicking the "Delete" action calls the delete method which then shows a confirmation popup as shown below:
 08-09 May


