Account Module
This module implements the Login, Register, Forgot Password, Email Confirmation, Password Reset, sending and confirming Two-Factor Authentication, user lockout, switch between tenants functionalities of an application;
- Built on the Microsoft's ASP.NET Core Identity library.
- Identity Server Grant and Consent pages.
- Setting page to manage self registration and two-factor authentication.
See the module description page for an overview of the module features.
How to Install
Identity is pre-installed in the startup templates. So, no need to manually install it.
Packages
This module follows the module development best practices guide and consists of several NuGet and NPM packages. See the guide if you want to understand the packages and relations between them.
You can visit Account module package list page to see list of packages related with this module.
User Interface
Menu Items
This module doesn't define any menu items.
Pages
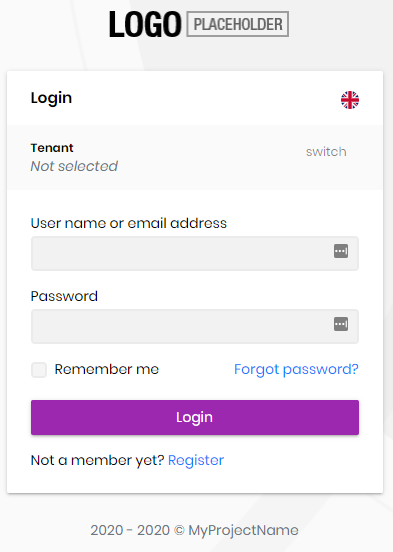
Login Page
Login page is used to log in to the system.
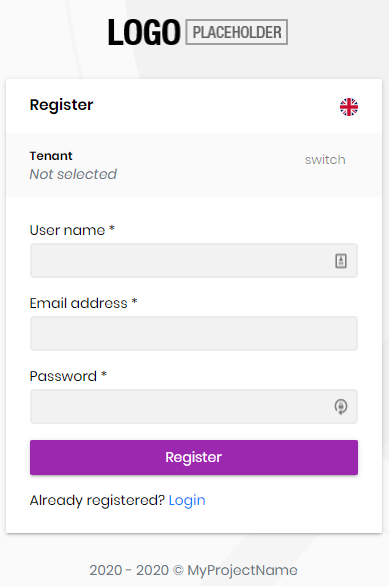
Register Page
Register page allows new users to register to your system.
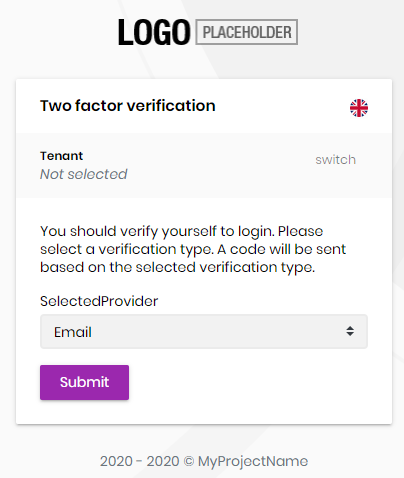
Two Factor Authentication
Identity module allows two factor authentication pages.
Send Security Code
Send security code page allows selecting a two factor authentication provider (Email, Phone etc...) and sends a security code to user via selected provider.
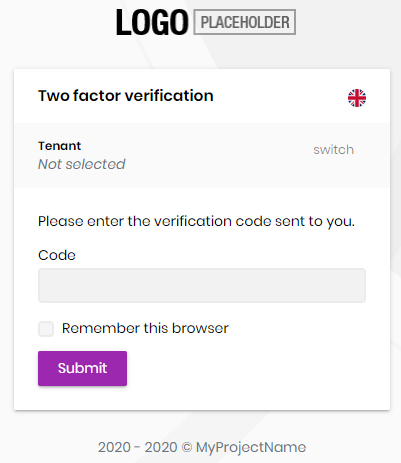
Verify Security Code
Verify security code page verifies the security code sent to user and if the code is verified, user logs in to the system.
Data Seed
This module doesn't seed any data.
Options
AbpIdentityAspNetCoreOptions
AbpAccountOptions can be configured in the UI layer, in the ConfigureServices method of your module. Example:
Configure<AbpAccountOptions>(options =>
{
    //Set options here...
});
AbpAccountOptions properties:
WindowsAuthenticationSchemeName(default: Windows): Name of the Windows authentication scheme.
Social / External Logins
Account module implements social/external login system. All you need to do is to install & configure the provider you want to use.
The application startup template comes with Twitter, Google and Microsoft logins pre-installed. You can configure the client id and secrets on the Settings page:
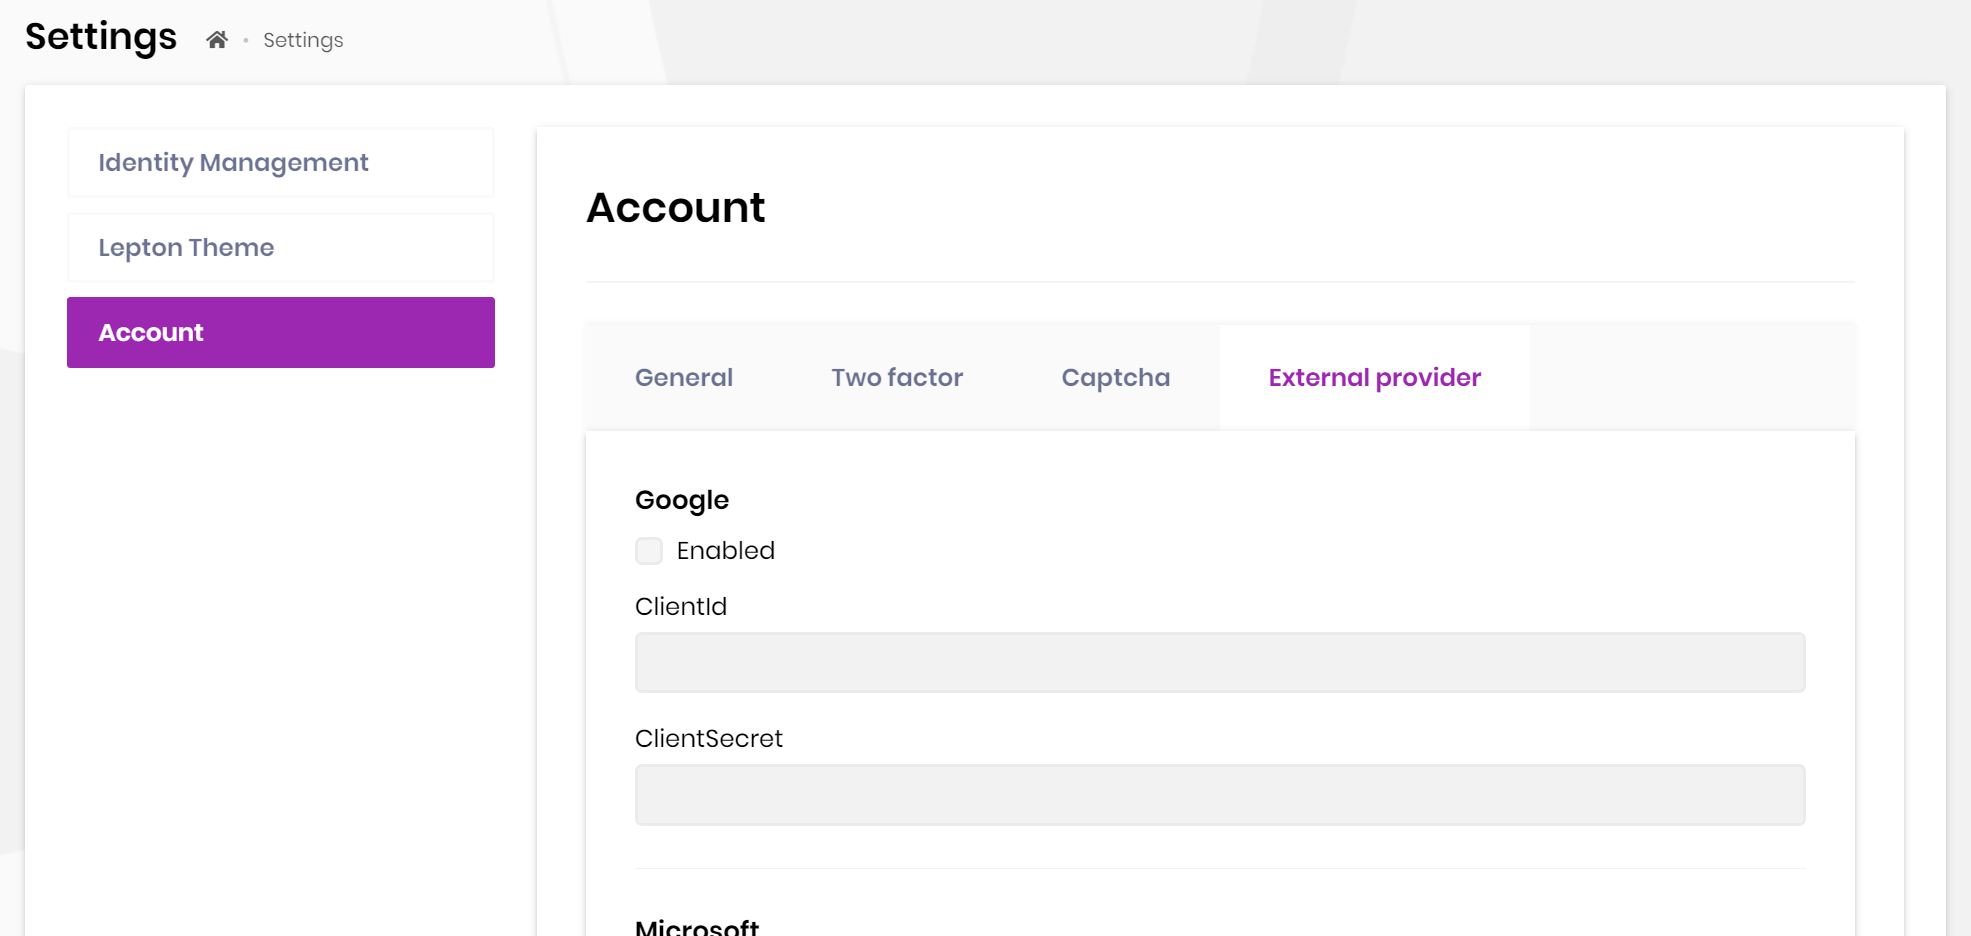
Social/External login system is compatible with the multi-tenancy. Each tenant can configure their own provider settings if your application is multi-tenant.
Install a new External Login
Follow the steps below to install a new external/social login. We will show the Facebook authentication as an example.
When you follow the steps below, the provider settings (e.g. ClientId and ClientSecret) will be managed on the settings page on the UI and will support multi-tenancy as explained above. If you don't want these features, you can follow the standard way to install and configure the provider.
Add the NuGet Package
Add the Microsoft.AspNetCore.Authentication.Facebook package to your project. Based on your architecture, this can be .Web, .IdentityServer (for tiered setup) or .Host project.
Configure the Provider
Use the .AddFacebook(...) and WithDynamicOptions() extension methods in the ConfigureServices method of your module:
context.Services.AddAuthentication()
    .AddFacebook(facebook =>
    {
        facebook.Scope.Add("email");
        facebook.Scope.Add("public_profile");
    })
    .WithDynamicOptions<FacebookOptions>(
        FacebookDefaults.AuthenticationScheme,
        options =>
        {
            options.WithProperty(x => x.AppId);
            options.WithProperty(x => x.AppSecret, isSecret: true);
        }
    );
AddFacebook()is the standard method that you can set hard-coded configuration.WithDynamicOptions<FacebookOptions>is provided by the Account Module that makes possible to configure the provided properties on the UI.
For Tiered / Separate IdentityServer Solutions
If your .IdentityServer is separated from the .Host project, then the .Host project should also be configured.
- Add the Microsoft.AspNetCore.Authentication.Facebook package to your
.Hostproject. - Add
WithDynamicOptions<FacebookOptions>()configuration into theConfigureServicesmethod of your module (just copy the all code above and remove the.AddFacebook(...)part since it is only needed in the IdentityServer side).
Internals
Settings
See the IAccountSettingNames class members for all settings defined for this module.
Application Layer
Application Services
AccountAppService(implementsIAccountAppService): Implements the use cases of the register and password reset UIs.AccountSettingsAppService(implementsIAccountSettingsAppService): Implements the use case of the account settings UI.
Permissions
See the AccountPermissions class members for all permissions defined for this module.
Angular UI
Installation
In order to configure the application to use the AccountModule, you first need to import AccountConfigModule from @volo/abp.ng.account/config to root module. AccountConfigModule has a static forRoot method which you should call for a proper configuration.
// app.module.ts
import { AccountConfigModule } from '@volo/abp.ng.account/config';

@NgModule({
  imports: [
    // other imports
    AccountConfigModule.forRoot(),
    // other imports
  ],
  // ...
})
export class AppModule {}
The AccountModule should be imported and lazy-loaded in your routing module. It has a static forLazy method for configuration. Available options are listed below. It is available for import from @volo/abp.ng.account.
// app-routing.module.ts
const routes: Routes = [
  // other route definitions
  {
    path: 'account',
    loadChildren: () =>
      import('@volo/abp.ng.account').then(m => m.AccountModule.forLazy(/* options here */)),
  },
];

@NgModule(/* AppRoutingModule metadata */)
export class AppRoutingModule {}
If you have generated your project via the startup template, you do not have to do anything, because it already has both
AccountConfigModuleandAccountModule.
Options
You can modify the look and behavior of the module pages by passing the following options to AccountModule.forLazy static method:
- redirectUrl: Default redirect URL after logging in.
Services
The @volo/abp.ng.account package exports the following services which cover HTTP requests to counterpart APIs:
- AccountService: Covers several methods that performing HTTP calls for
Login,Register,Change Password,Forgot Password, andManage Profilepages.
AccountModule Replaceable Components
eAccountComponents enum provides all replaceable component keys. It is available for import from @volo/abp.ng.account.
Please check Component Replacement document for details.
Remote Endpoint URL
The Account module remote endpoint URLs can be configured in the environment files.
export const environment = {
  // other configurations
  apis: {
    default: {
      url: 'default url here',
    },
    AbpAccountPublic: {
      url: 'AbpAccountPublic remote url here'
    },
    AbpAccountAdmin: {
      url: 'AbpAccountAdmin remote url here'
    },
    // other api configurations
  },
};
The Account module remote URL configurations shown above are optional. If you don't set any URLs, the default.url will be used as fallback.
Distributed Events
This module doesn't define any additional distributed event. See the standard distributed events.
 08-09 May


