Microservice Template: Tye Integration
This documentation introduces guidance for running your microservice template on dotnet/tye. We suggest using tye for your development environment. You can check tye getting started page for installation. Running angular application on tye is not supported yet however you can still run all the other stack on tye and run the angular application as it is.
Create Developer Certificates
Windows Users: Run the powershell script file
create-certificate.ps1. This file will create a self-signed certificate namedlocalhost.pfxwith a predefined password using dotnet dev-certs command.Linux Users: dotnet dev-certs may not be fully working on Linux so you may need to generate and trust your own certificate and put
localhost.pfxfile under etc/dev-cert folder inside solution directory.Generate the certificate: Run the commands below to create necessary localhost.pfx file for https certificate under etc/dev-cert folder:
# See https://stackoverflow.com/questions/55485511/how-to-run-dotnet-dev-certs-https-trust
# for more details

# Generate certificate from config
openssl req -x509 -nodes -days 365 -newkey rsa:2048 -keyout localhost.key -out localhost.crt \
  -config localhost.conf

# Export pfx
openssl pkcs12 -export -out localhost.pfx -inkey localhost.key -in localhost.crt -password pass:e8202f07-66e5-4619-be07-72ba76fde97f

# Import CA as trusted
sudo cp localhost.crt /usr/local/share/ca-certificates/
sudo update-ca-certificates

# Validate the certificate
openssl verify localhost.crt
Mac Users: You can either download powershell and use the
create-certificate.ps1file to let dotnet dev-certs create the certificate or create the certificate manually using openssl as above.
Running Tye
Make sure you are already running the infrastructure.
Use the command tye run under your main solution directory to run the solution.
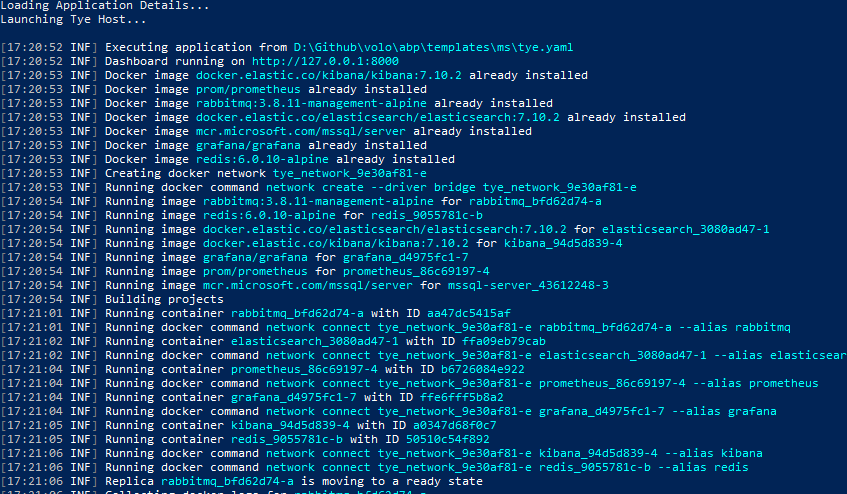
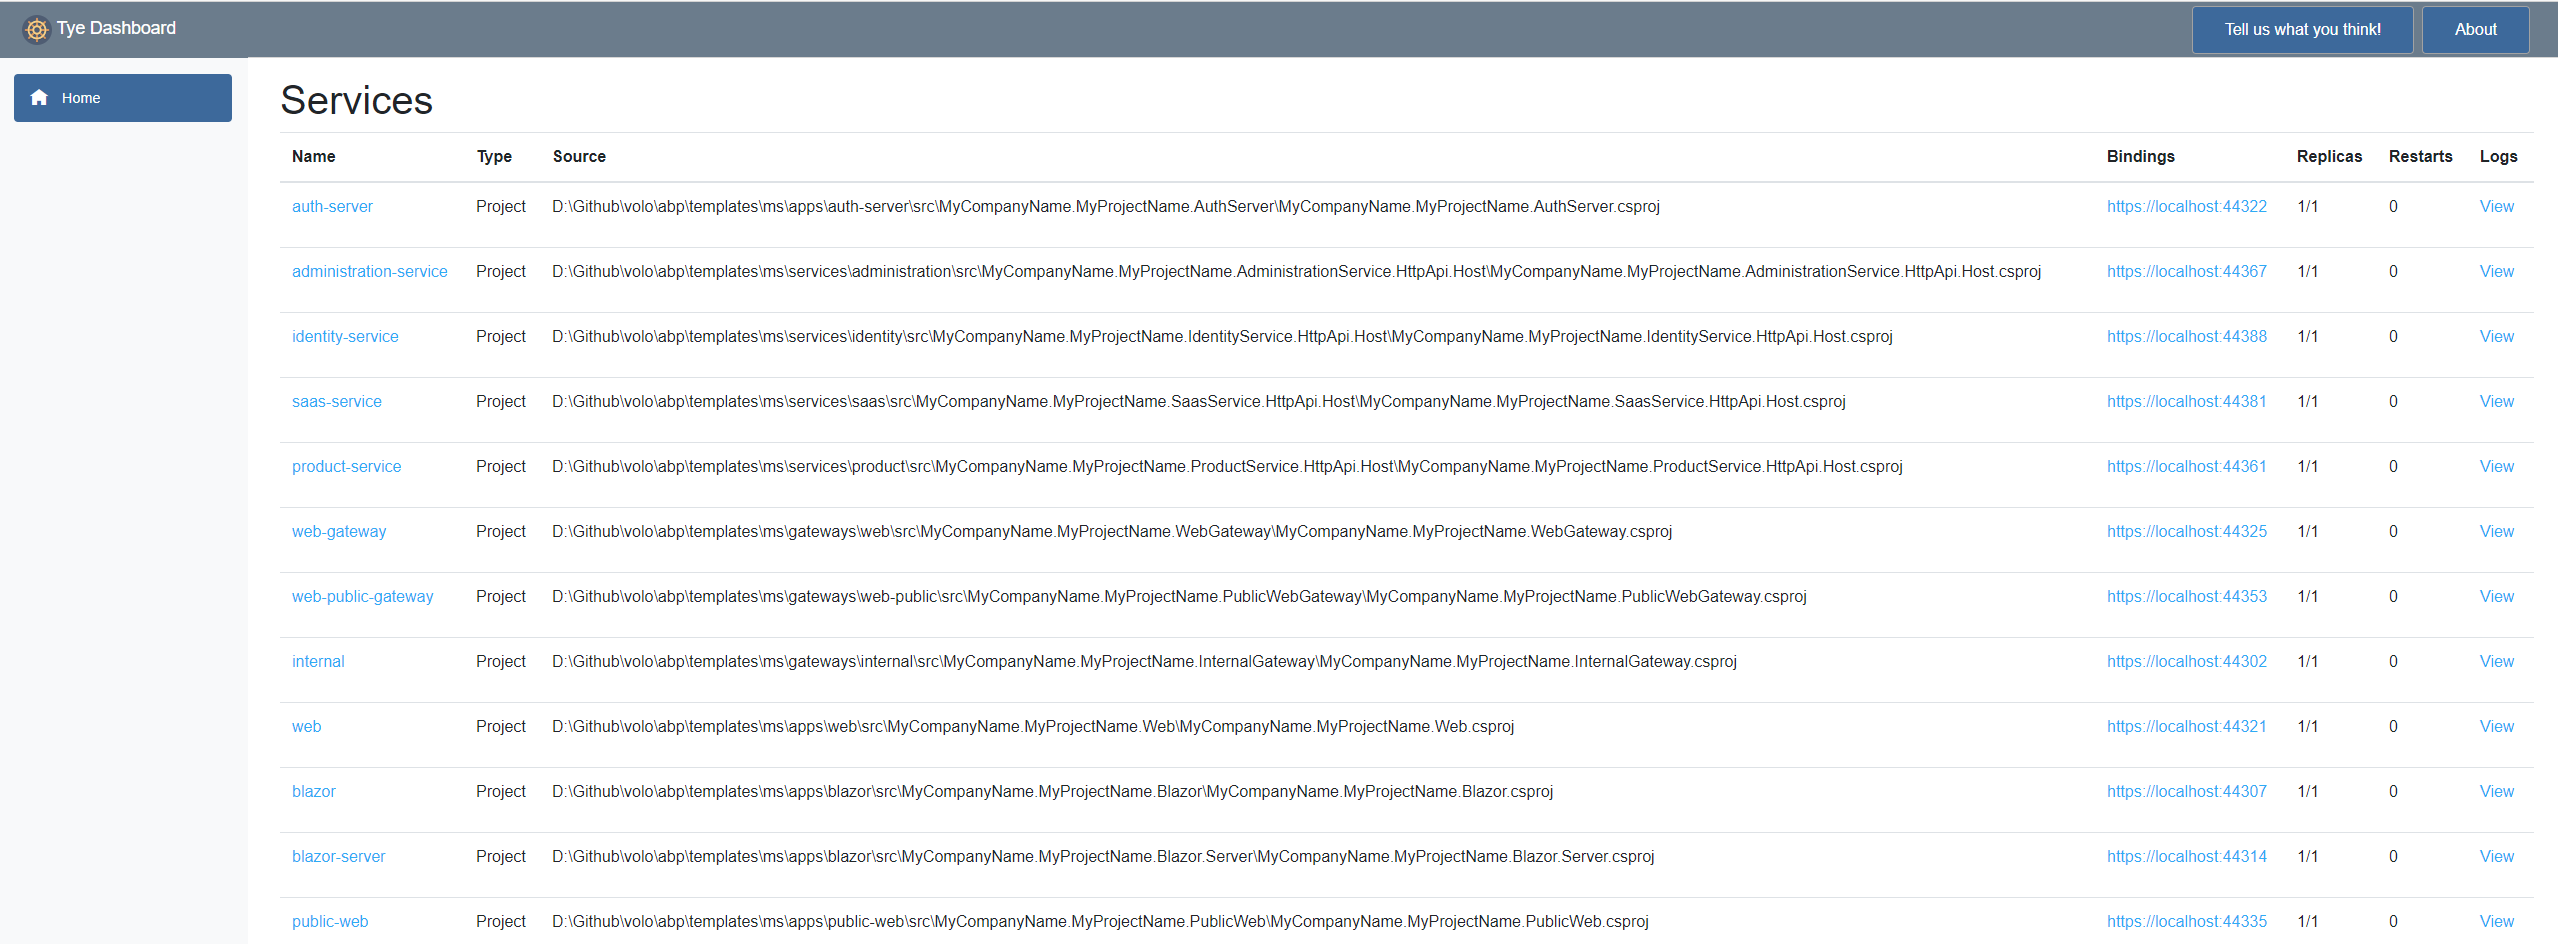
After tye is initialized, you can navigate to http://127.0.0.1:8000 (or http://localhost:8000) for tye dashboard.
Tye Options
For all the run options, you can simply use
tye run -hcommand.
Debug
You can debug any service by attaching to a process. To run a service on debug mode simple use the command with the service name you want to debug:
tye run --debug my-service
You will see an awaiting notice for attaching to a process when you View the Logs of the service you debug:

In this state, product service will not start until you attach a debugger.
In Visual Studio go to menu Debug -> Attach to Process then select the service process you are debugging.

You can debug your application normally.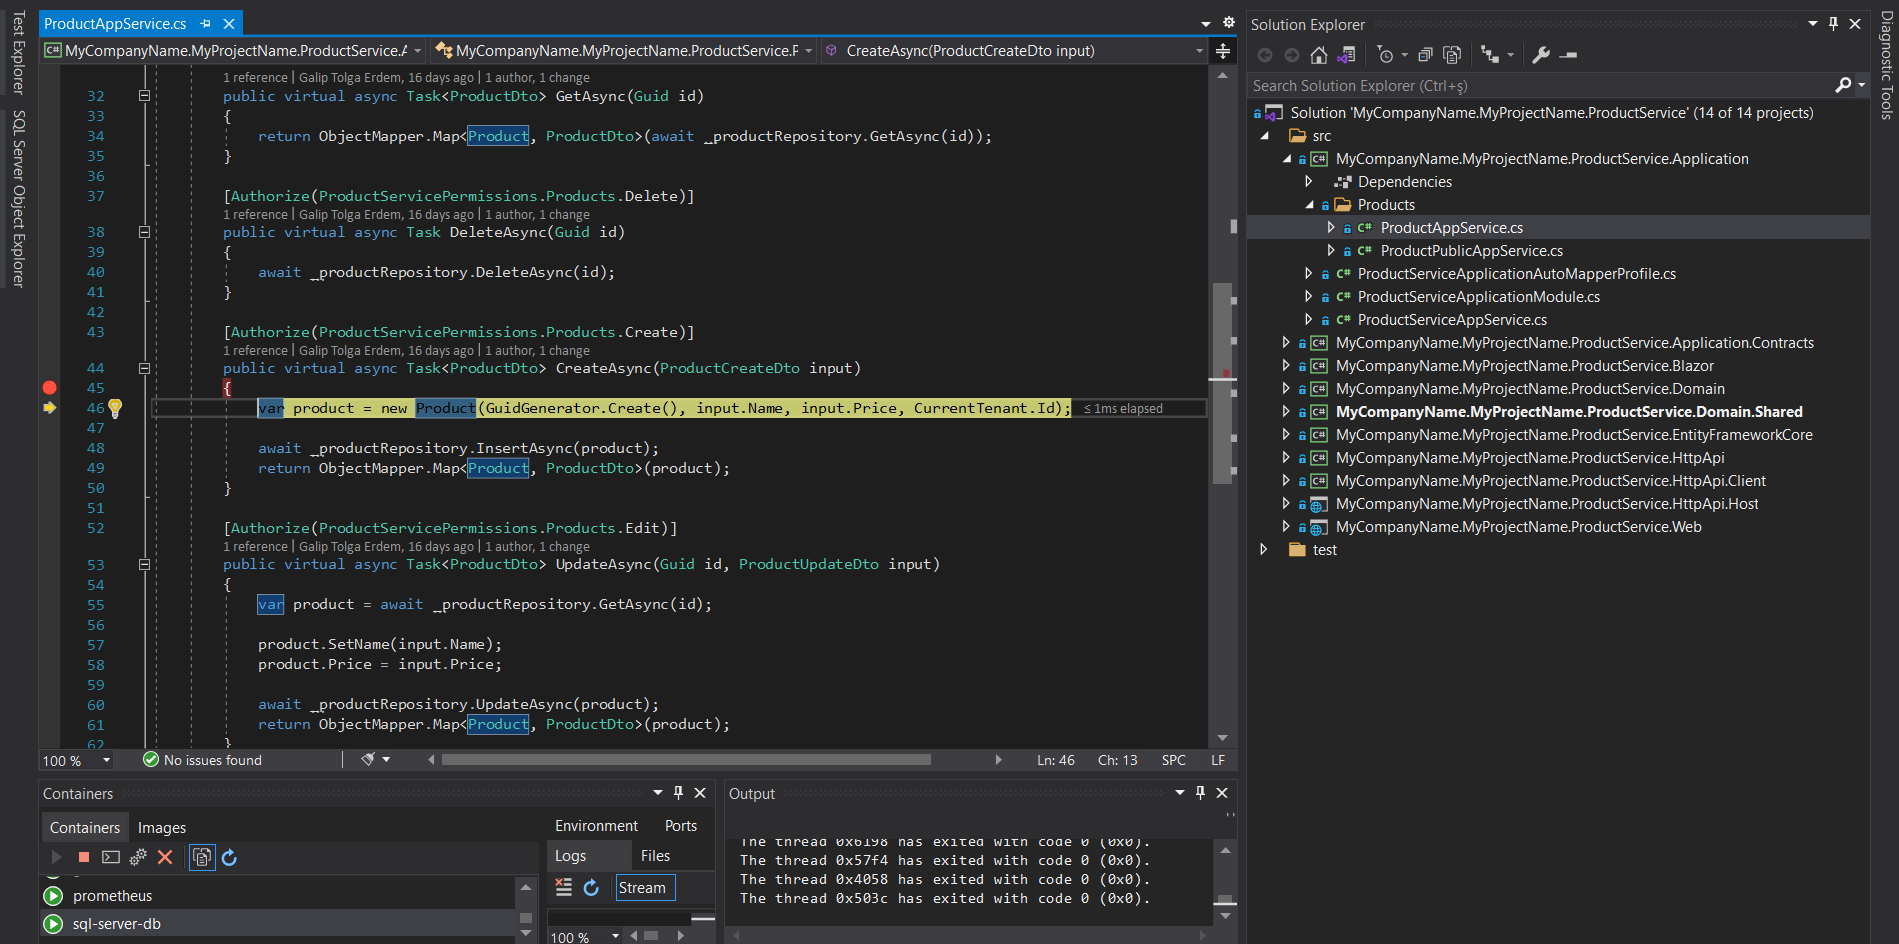
If you want to attach a debugger to all of your services, you can use * instead of service name like:
tye run --debug *
Watch
To improve the development pace, you can also enable the file system watchers. This way, only the modified and effected services will be restarted. To enable file watcher simply add --watch switch to run command:
tye run --watch
Stop
To stop tye, simply use the command Ctrl+C on the console tye is running. Keep in mind that, close the tye dashboard before stopping tye since tye may sometime fail to stop processes successfully.
 08-09 May


