Getting Started with the React Native
ABP Commercial platform provides a basic React Native template to develop mobile applications integrated to your ABP based backends.
When you create a new application as described in the getting started document, the solution includes the React Native application in the react-native folder as default.
Configure Your Local IP Address
A React Native application running on an Android emulator or a physical phone cannot connect to the backend on localhost. To fix this problem, it is necessary to run backend on your local IP address.
You should turn off the "Https Restriction" if you're using OpenIddict as a central identity management solution. Because the IOS Simulator doesn't support self-signed certificates and OpenIddict is set to only work with HTTPS by default.
How to disable the Https-only settings of OpenIddict
Go to MyProjectNameHttpApiHostModule.cs under the host project. Add put these codes under the PreConfigureServices function.
#if DEBUG
 PreConfigure<OpenIddictServerBuilder>(options => {
 options.UseAspNetCore()
 .DisableTransportSecurityRequirement();
 });
#endif
Run the Server Application
Run the backend application as described in the getting started document.
React Native application does not trust the auto-generated .NET HTTPS certificate, you should use the HTTP during development.
Go to the react-native folder, open a command line terminal, type the yarn command (we suggest to the yarn package manager while npm install will also work in most cases):
yarn
- Open the
Environment.jsin thereact-nativefolder and replace thelocalhostaddress on theapiUrlandissuerproperties with your local IP address as shown below:

Make sure that
issuerandapiUrlmatches the running address of the.HttpApi.Hostor.Webor.Blazor(BlazorServer UI) project.
Once all node modules are loaded, execute yarn start (or npm start) command:
yarn start
Wait Expo CLI to start. Expo CLI opens the management interface on the http://localhost:19002/ address.

In the above management interface, you can start the application with an Android emulator, an iOS simulator or a physical phone by the scan the QR code with the Expo Client.
See the Android Studio Emulator, iOS Simulator documents on expo.io.
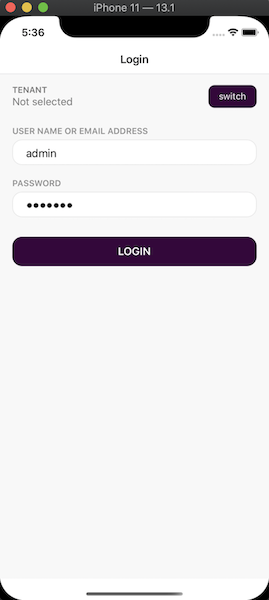
Enter admin as the username and 1q2w3E* as the password to login to the application:
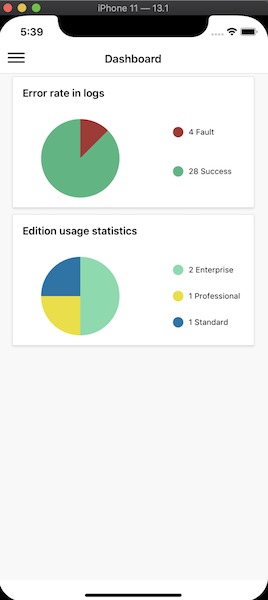
The application is up and running. You can continue to develop your application based on this startup template.
 08-09 May


